Karin Wanderer Learns

I use watercolors, Krita, & pixel art/animation to paint flora & fauna & fanart. Self-taught & still learning; no AI, no NFT, & no ads. New post on Tuesdays.

Hello & Hello Again!

This week’s blog is written by KWL’s very first guest blogger! This is my favorite pizza #recipe, from my favorite pizza chef. Introducing the sweet pepper to my red onion, the mutant turtle to my samurai rabbit, self-certified Pizza Expert: Wolfe3D!

Watercolor & ink painting of a man with curly brown hair & a beard smiling as he leans out from behind a computer monitor. There is a Superman action figure on his desk & a Super Star on his monitor. Certified Pizza Expert

Wolfe3D, developer of free PICO-8 awesomeness & frequent contributor to PICO-View! Pronouns: He/him Profession: Visual Effects Artist/Teacher Hobbies: Music, cooking, retro gaming Where to find me: Reddit, Discord, BBS, or Mastodon.

I’m working on a free Teenage Mutant Ninja Turtles fan game called Shredder’s Prevenge for Pico-8, which should work on your phone or computer. It’s a great way to learn coding and have fun! I hope to make games based on original ideas some day, but for now this is a way to build experience and learn the tools and systems I need to make those games. It’s a side-scrolling beat-em-up like most TMNT games, but with a few unique touches including an interactive arcade and a vs. mode.

One of the things I love the most about PICO-8 is the community. Whether it be in the subreddit, the Discords, or on Mastodon, everyone involved in the PICO-8 scene tends to be friendly, welcoming to newcomers, and generous with their knowledge and skills. Thanks to all of you for helping me to learn, and to teach.

To Pizza!

This recipe makes 4 pizzas’ worth of dough. If you get this dough going on a Sunday night you won't have to worry about dinner until next Friday! You can bake it on a cookie sheet, we used a 12 inch round pizza pan.

Ingredients: * 4 cups AP flour * 1 tablespoon active dry yeast * 4 tablespoons of sugar * 1 teaspoon of salt * ⅓ teaspoons of baking soda * 1 cup of warm water * 2-3 cups of room temperature or cold water * Olive oil * Semolina flour * Low moisture mozzarella OR sharp cheddar & Monterey jack cheese * Pizza toppings

Kitchen counter is crowded with a mixing bowl & ingredients, such as salt. flour, & baking soda.

Step 1: Add yeast to warm water and allow 4-5 minutes to activate.

Step 2: Set aside 1 cup of flour. It will be used in step 5.

Step 3: Combine the other dry ingredients, and a drizzle of olive oil in a large bowl. Mixing bowl full of pizza dough ingredients, ready to be mixed.

Step 4: Add warm, yeasty water to the bowl and combine. Add cold water until flour is absorbed and a sticky dough forms. Mixing bowl full of very sticky dough.

Step 5: Add 4th cup of flour to bowl and mix until flour is absorbed and dough can be touched without sticking to your hands. Mixing bowl full of dough that is no longer sticky to touch.

Step 6: Form dough into a ball, cover with cloth and allow to rise.

Step 7: After the dough has risen (approximately 1 hour), cut into 4 separate pieces and place each into a greased bowl 2 pictures side-by-side. Pic 1 is a mixing bowl with a small ball of dough in it. Pic 2 is the  mixing bowl with a larger ball of dough in it.

Step 8: Cover any dough you want to store with plastic wrap and put into the refrigerator at least overnight. Allow at least 3-4 hours of rising time if you want to eat it today.

Step 9: Preheat oven to 475°F (246°c)

Step 10: Grease the baking pan and liberally sprinkle semolina flour. A round baking pan with semolina flour dusted across it.

Step 11: Stretch dough carefully into a disc and place on a baking sheet. A round baking pan with a raw pizza crust on it.

Step 12: Add sauces, cheeses, toppings, etc. 2 pictures side-by-side.  Pic 1 is Raw pizza dough on a round pan with a few spoonfuls of tomato sauce in the center.  Pic 2 is Raw pizza dough on a round pan with a tomato sauce spread across the dough.

Step 13: Focus topping placement towards the center of the pizza; toppings will drift towards the crust as it bakes. We like chicken or veggie sausage with mushroom, onions, or peppers. 2 pictures side-by-side. Pic 1 is an uncooked cheese pizza. Pic 2 is an uncooked pizza with sliced sausage & mushrooms on it.

Step 14: Bake at 475 for 10 to 15 minutes or until the cheese is melted and beginning to brown.

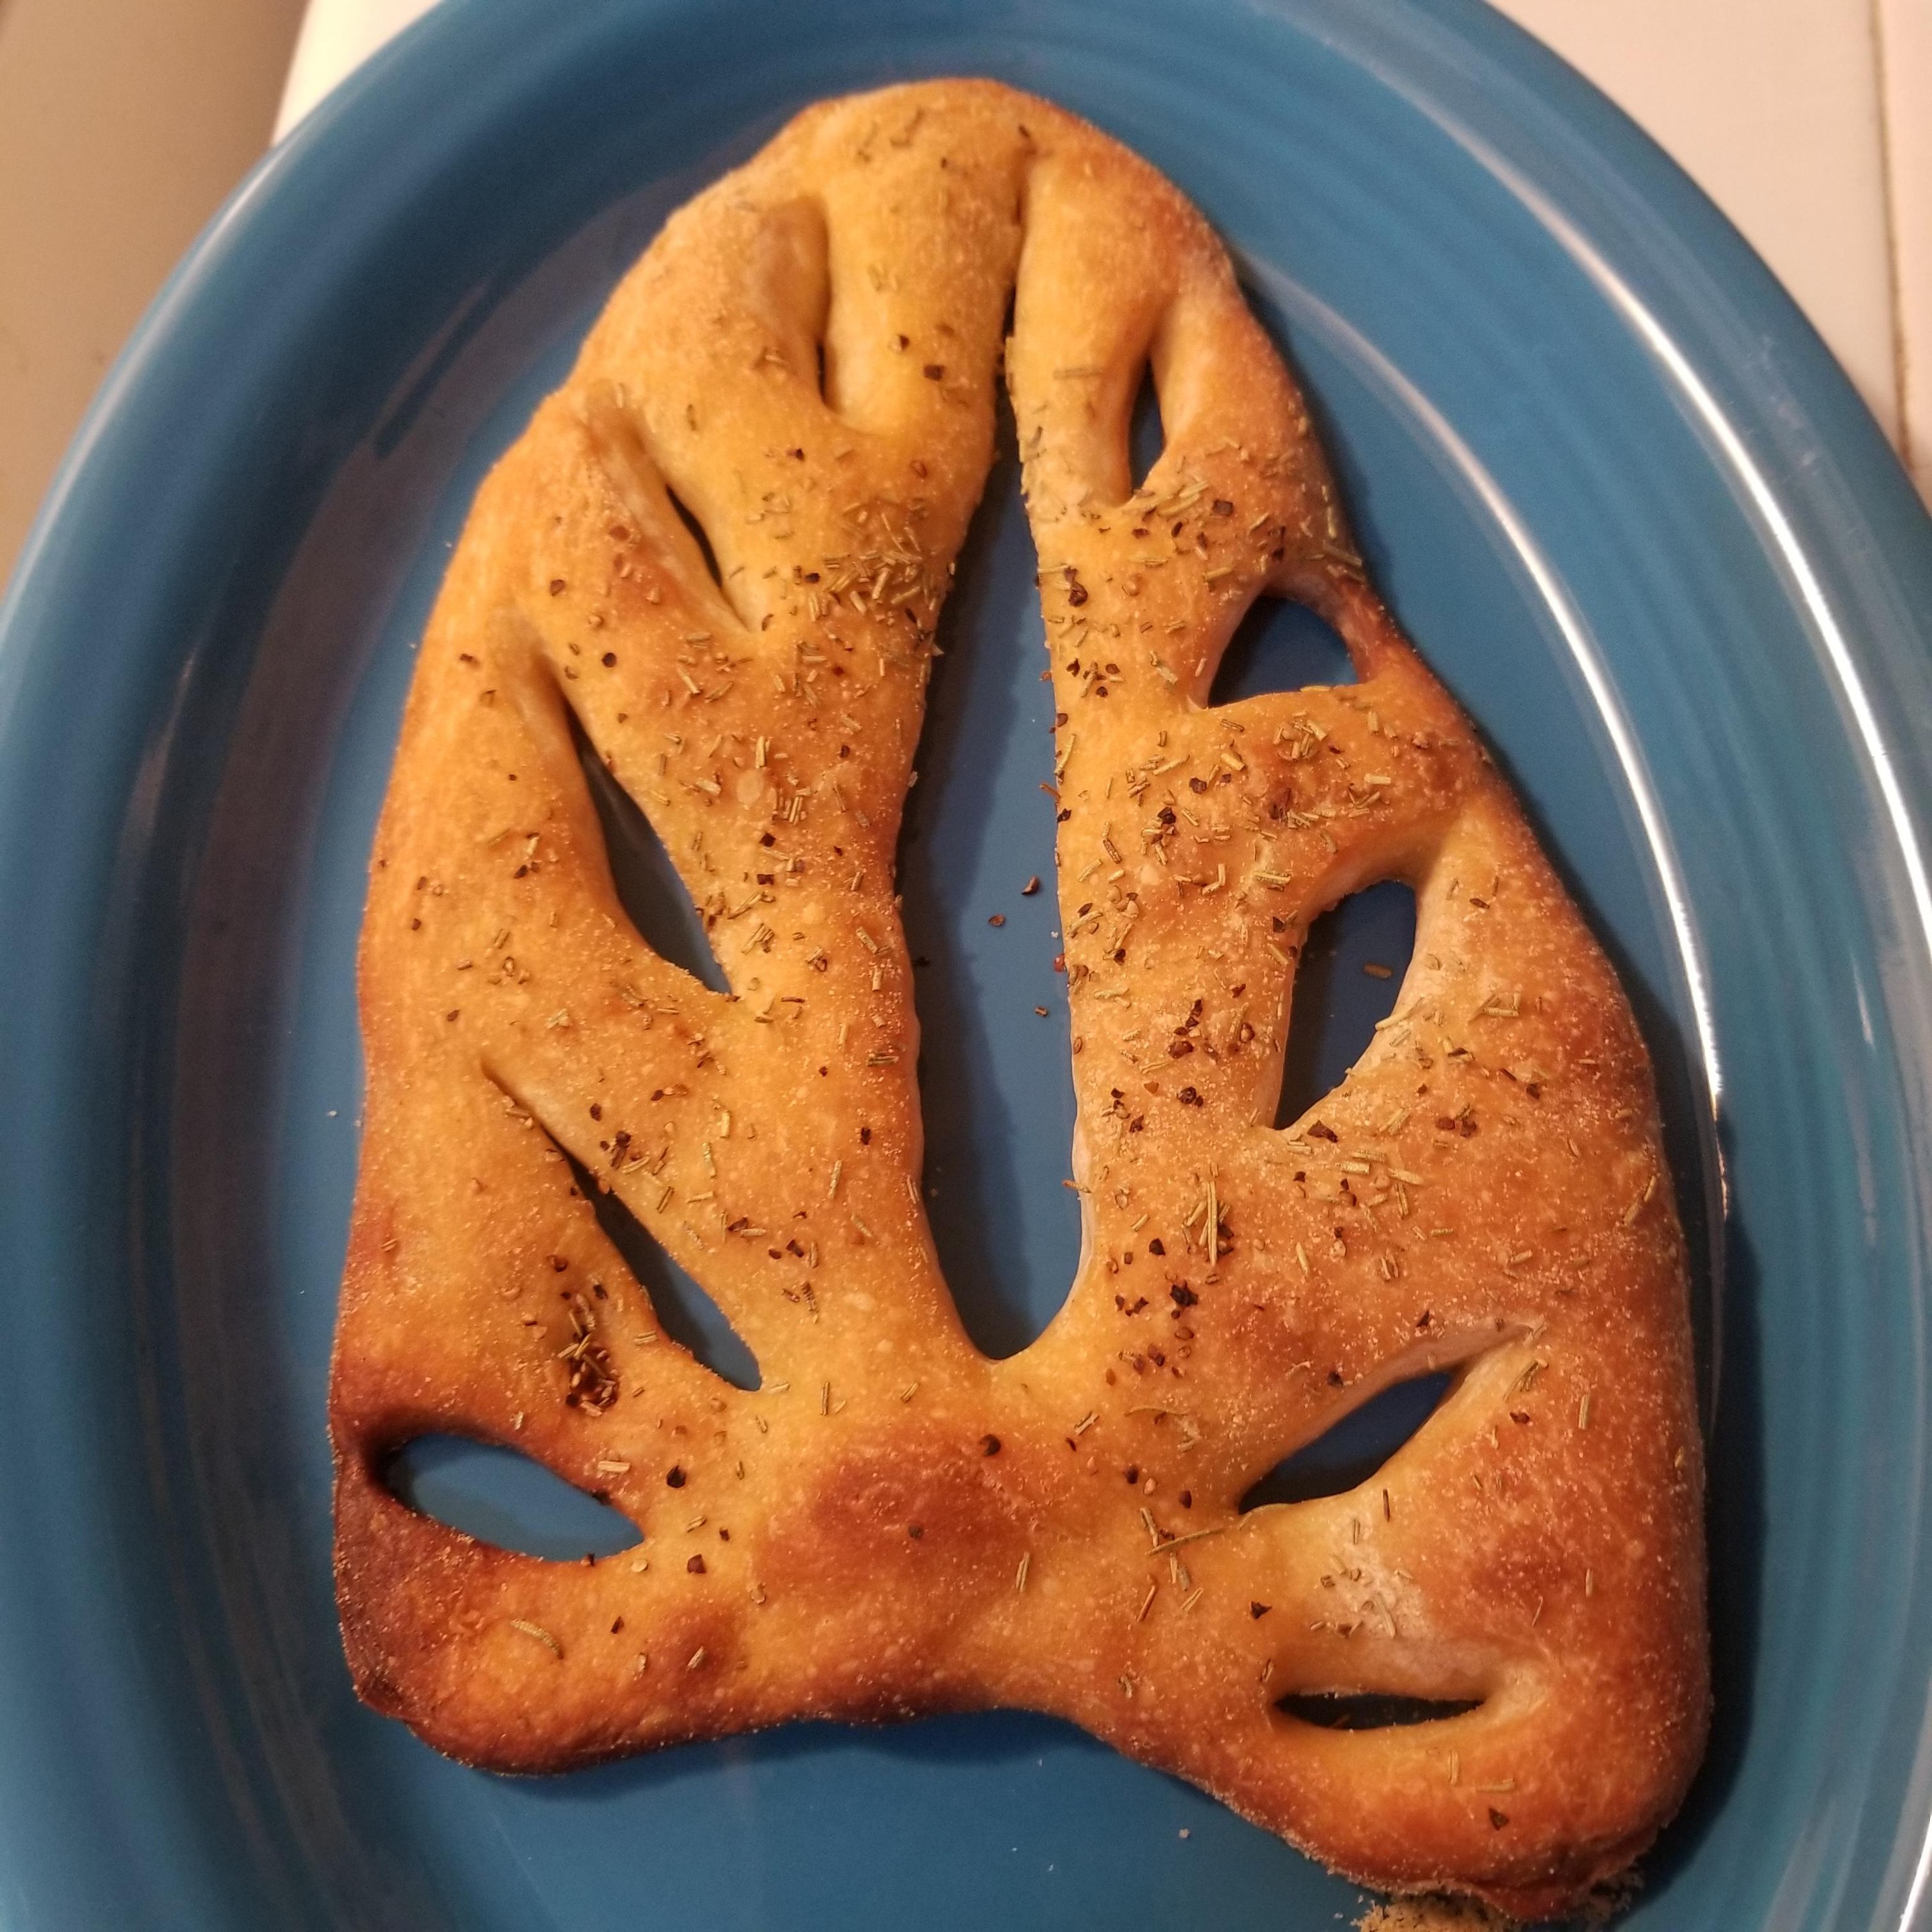
Step 15: Add spices and extras such as parmesan cheese, red pepper flakes, oregano, or garlic salt. 2 pictures side-by-side. Pic 1 is a close up of the pizza. Pic 2 is slices of the pizza on a blue plate.

Step 16: Slice, serve, and enjoy!

Hope you like the pizza, folks. Stay radical! -Wolfe3D

We’ll be back to our regularly scheduled art blog next week. If you want more awesome food ideas, click #recipe, included there are several non-pizza foods you can make with pizza dough. If you make any of these recipes, share pics with me!
See you next week.

Get my art on mugs & vinyl stickers in my Shop!

Join us for #KWPrompts, a biweekly art challenge!

Find me on Linktree

  • All pictures posted are my own work.
  • All reviews are my own unpaid & unsolicited opinions.
This blog has an ongoing series of #WatercolorScience articles about how different types of weather affect your painting, even if you work inside. Extreme Heat & low humidity: We're Having a Heat Wave & I Started This Heat Wave Freezing Temperatures: When Winter Comes Howling In Humidity & Rain: Lost in a Fog

If you want to paint en plein air (fancy art term for outside) you will need to consider the weather as well as a number of other factors. Let’s begin at the beginning.

A Super Beginner’s Guide to Painting Skillfully Outside

Painting outside is more different from painting inside than you may realize. What you bring to paint, what you bring for yourself, where you go, how you sit… Everything has to be thought out in advance. Start with figuring out what you want to bring with you & then do a test run at home. I tried out my potential art kit while sitting on my tiny porch. This helped me realize I had completely forgotten a waterproof pen & water for me to drink.

Outside art kit arranged on a small, round table. Glass of water with lid, cloth, 3 paintbrushes, many-colored watercolor palette, & a black & white gouache palette.

The following lists are just suggestions – I don’t carry everything on them, & sometimes I pack extra things. I don’t have a car, so generally if it won’t fit in a backpack, it doesn’t go in my kit. Luckily enough there are several parks with chairs & tables nearby, so I can skip carrying in my own furniture!

Kit For Painting

  • Paper
  • Waterproof pen(s)
  • Brushes: sizes 2,6, & one from 99¢ store.
  • Jar with a tight-fit top for water
  • Cloth to wipe your brushes on – a tshirt rag or old athletic wristband is reusable
  • Paper towel – there’s nothing like it for dabbing at watercolors – tuck it in your wristband or under your paint while you’re working so it’s less likely to blow away
  • Easel or Clipboard or Table (or plan on working with a sketchbook in your lap, like I do)
  • Small DIY travel palette. This has black & white gouache & will someday have 3 primary watercolors in it, but I need to buy more tube paint for that.
  • Paints, of course! I used a watercolor paintbox for the test. I will bring watercolor markers when I’m not working right on my porch, as they take up less space & use less water. I got lazy here & grabbed the paint that was already out.

Things to Think About

If you get impatient, like me, bring enough paper so you can work on multiple paintings at once. That way you can switch between them, leaving ample time for each painting to dry before you continue. I generally have 4 rectangles of paper taped into my sketchbook, so I can keep it open & just rotate to a new painting.

If you are pressed for time, consider painting at home & save the excursion for another day. Remember, if you try to pack up wet paintings they will be ruined by the time you get home! I walked home carrying an open sketchbook once because I ran out of time. It wasn’t the end of the world, but it was quite annoying.

Another option to consider is using a “wet panel carrier”. It is a small briefcase-like box that (can you guess?) carries wet paintings. You can probably buy one, but you could also DIY one. You could even kick back, relax for a couple weeks until I make one, & then read my future blog post about it! (I’ll add a link here when I write it)

Kit For Humaning

  • Seating of some kind (even if you work standing up, you’ll probably want to sit at some point!)
  • Water
  • If you like to listen to something while you work, wear your most stable headphones! This is not the time for ill-fitting earbuds you are constantly adjusting.
  • Snacks
  • Sunscreen
  • Bug spray
  • Lightweight jacket
  • Umbrella or wide-brimmed hat
  • Backpack (or a reusable shopping bag, whatever you’ve got) to carry it all
  • Camera – the one on your phone will do just fine!

Obviously this is not an exhaustive list. It's going to change not only person-to-person, but day-to-day. Water is the most important thing here. Your paints will dry faster outside & so will you! Make sure you bring plenty of water to drink, even if it isn’t hot.

One More Thing To Think About

Be prepared to carry everything you need in & back out again. This is a literal ‘take only pictures, leave only footprints’ scenario. Many articles that I have read advise using ‘found water’ & ‘found objects’, but only do this if the location you picked specifically allows it! Also be aware of what might be in that ‘found water’. How might various pollutants affect your paints & brushes? This is always a concern, but especially after massive flooding or near construction sites.

What’s Next?

OK, we’ve got our painting kit together with our water & sun protection. Now what? How do we actually paint outside? We’ll cover that in a future article. When? I don’t know. Southern California is getting hit by a tropical storm, we’re about to go into another heat wave, & we literally had an earthquake as I edited this paragraph. This #EnPleinAir series will continue in a few weeks.

Next Tuesday’s Karin Wanderer Learns will be my 30th article! It’s going to be about Pizza & the Teenage Mutant Ninja Turtles. (My 20th article had my favorite vegan cake recipe.) I never intended to make KWL into a baking blog every 10 weeks, but I’m happy it’s turning out this way. See you then!

Get my art on mugs & vinyl stickers in my Shop!

Join us for #KWPrompts, a biweekly art challenge!

Find me on Linktree

  • All pictures posted are my own work.
  • All reviews are my own unpaid & unsolicited opinions.
How Does Humid Weather Affect Paint?

It’s probably not very surprising that “water” is an essential part of “watercolors”, especially if you’ve read my last 3 articles! In this case the high amount of water in the air is affecting everything, so the problems & the solutions are all slightly different than what we’ve seen before.

The best humidity to work in for most paints, not just watercolors, is in the 40-60% range. Painting in high humidity – at or above 70% – is going to affect every aspect of your watercolor experience. This is true even before you start mixing paints.

Before You Paint

Museums tend to keep the humidity between 50-60% in order to protect the paintings hanging there. This is too dry for mold or mildew to grow, without being so dry that the paper or paint are damaged. If you can work inside near a dehumidifier, make sure it is running well before you start painting.

If you have been storing paint supplies in areas over 70% humidity, or near cold surfaces where condensation builds up (e.g. windows, water pipes, etc.), check all your supplies for mold & mildew before you start painting. Once watercolor supplies have gone moldy, they cannot be used. They will spread the mold to every pan, brush, & painting they touch. Any mold can mess with pigments. Some molds are dangerous to your health. There is no way to dry out your supplies enough to kill every single spore, so each time you add water to start painting you will just be re-invigorating the mold. I’m so sorry. If you see/smell mold, it’s over.

If your paper is not moldy, but has been stored in a humid area, test the paper’s sizing before you start. “Sizing” in this case means the treatment the paper has received so that it absorbs the paint properly without dulling the colors.

Watercolor of a woman. Her clothes are bright green & her skin is peachy-pink. She sits resting her chin on one hand while looking out at the viewer. Her head is on fire, the flames are vibrant orange & yellow. Properly-sized fire

Have you ever tried painting on printer paper & the colors end up washed-out or uneven? The paper wasn’t sized, & too much pigment ended up inside the paper instead of on top of it.

Watercolor of a woman. Her clothes and skin are washed-out. She sits resting her chin on one hand while staring listlessly at a coffee cup. Her head is on fire, but even the flames are washed-out. Poorly-sized fire

Sizing can be made of gelatin, starch, or a number of other ingredients that all degrade over time, especially in humid environments. Paper that has lost its sizing can still be used for drier media, or you can resize the paper using a product called Watercolor Ground. I have no personal experience with this product, but I want to try it. Watercolor Ground will let you watercolor on not only paper, but also metal, glass, plastic, fabric… just about anything!

While You Paint

There are myriad tips & tricks to weather the humidity a little better while painting. Please be aware, painting in extreme humidity can be dangerous. Sweat does not cool you as efficiently in humid heat & humid cold can sap your body heat very quickly. The following tips are more appropriate for painting in a poorly-insulated studio or out on your porch than on a mountaintop. Please read guides on proper clothing & safety equipment before painting en plein air (fancy art term for outside) in humid weather.

  1. Do not paint in the most humid parts of the day, if you can avoid it. Mid-morning to early evening will be more comfortable for you & your watercolors, as it is comparatively drier. Want to know the best time to start in your area? Touch grass. Once the dew has dried, you’re usually OK to start painting.

  2. Work on multiple pieces at once, if you can. Everything dries more slowly when it’s humid. If you switch between pieces, it’s easier to wait until each layer of each painting is really truly dry. Don’t muddy your colors or blur a piece just because you’re impatient!

  3. Give your paintings lots of support. If you’ve painted even a single watercolor painting I probably don’t need to tell you how water can make paper buckle & ripple. That can be much worse in humid weather, & the paint is more likely to peel. Make sure you tape, tack, stretch, or otherwise secure your paper to avoid this trouble! The adhesive in tape can fail if it gets too wet, consider using binder clips.

  4. I don’t think I can emphasize enough how long everything is going to take to dry. It will take forever. Maybe even twice that. If your paper looks dry but feels cool to the touch, it is still damp. Give it more drying time!

  5. Turn on a fan. You may not want it pointed directly at your paper, but keeping the air moving will make everything better for you & your painting.

  6. Switch to a different medium entirely! I recently switched from ​300 lb (640 gsm) watercolor paper to cardboard from a cereal box, as well as using ink along with my paint, as the humidity fell so low the “water” part of my colors was evaporating before I could work.

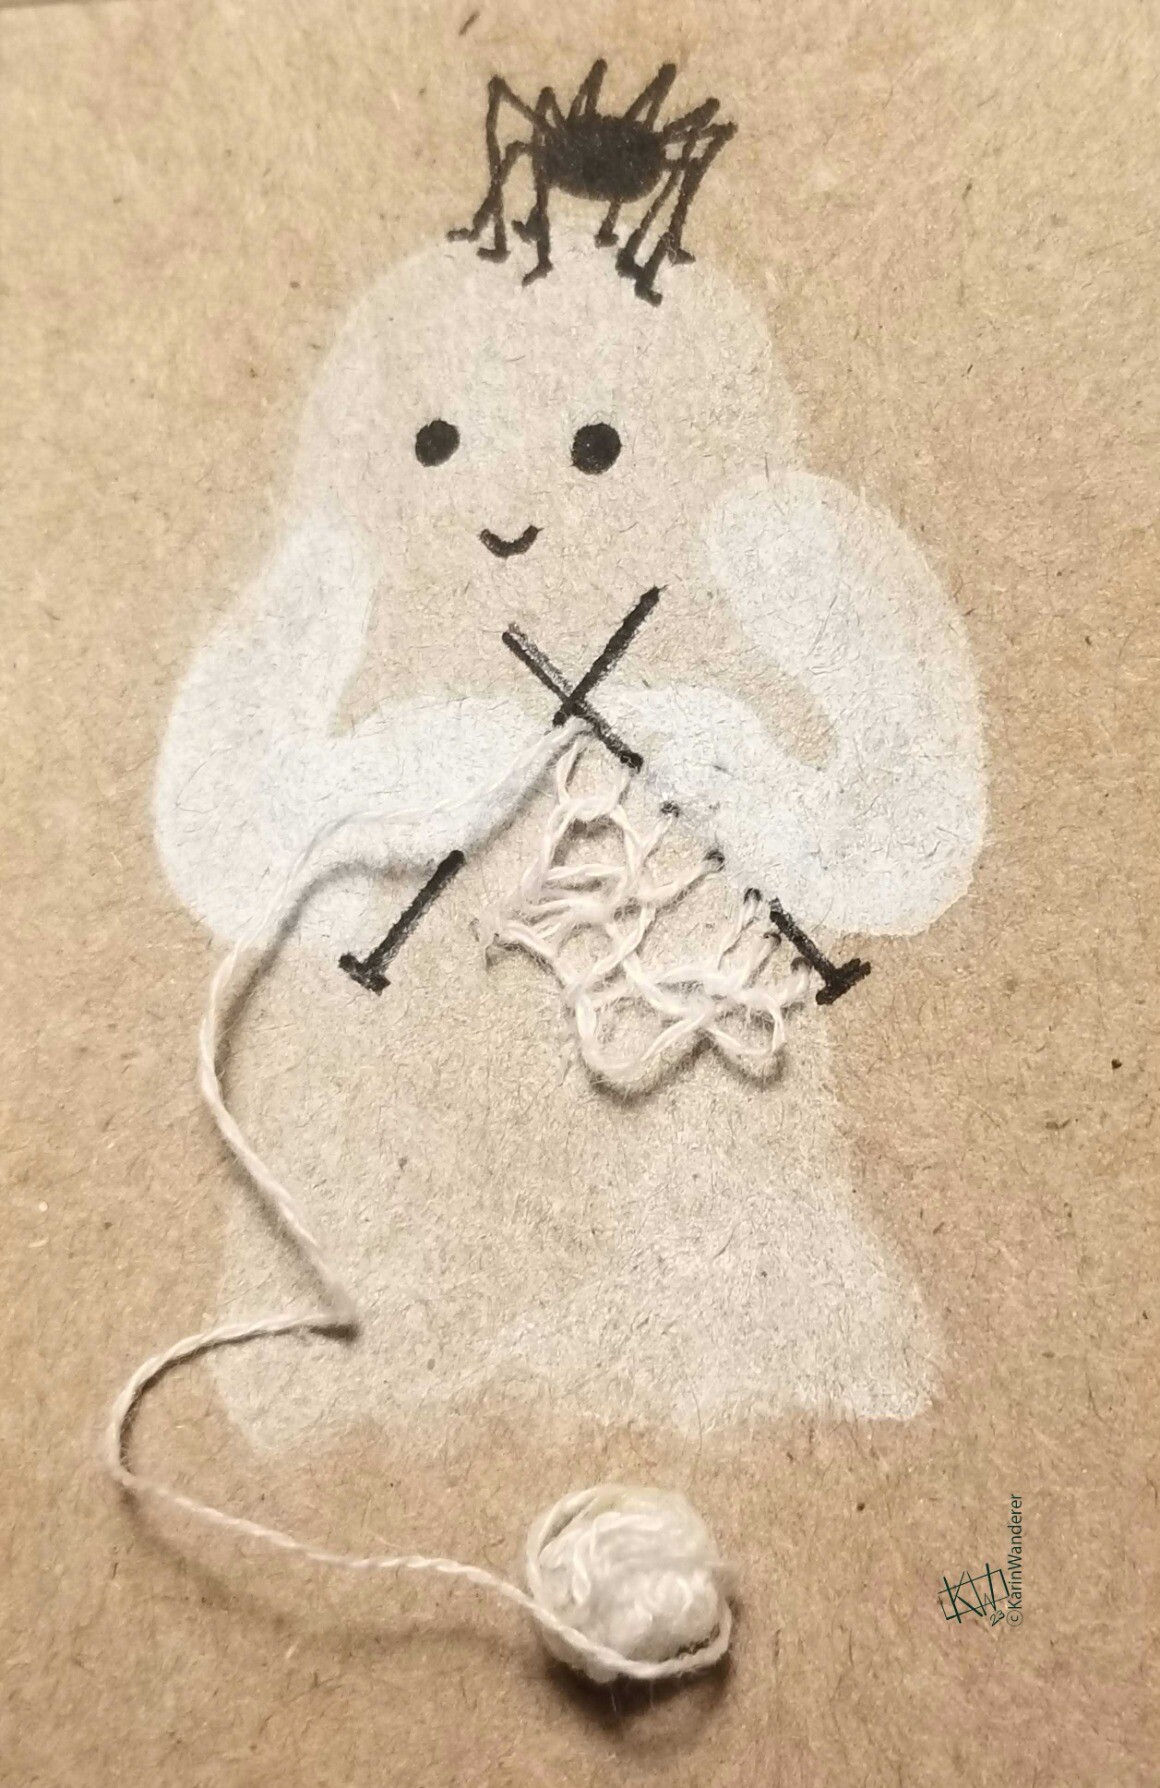
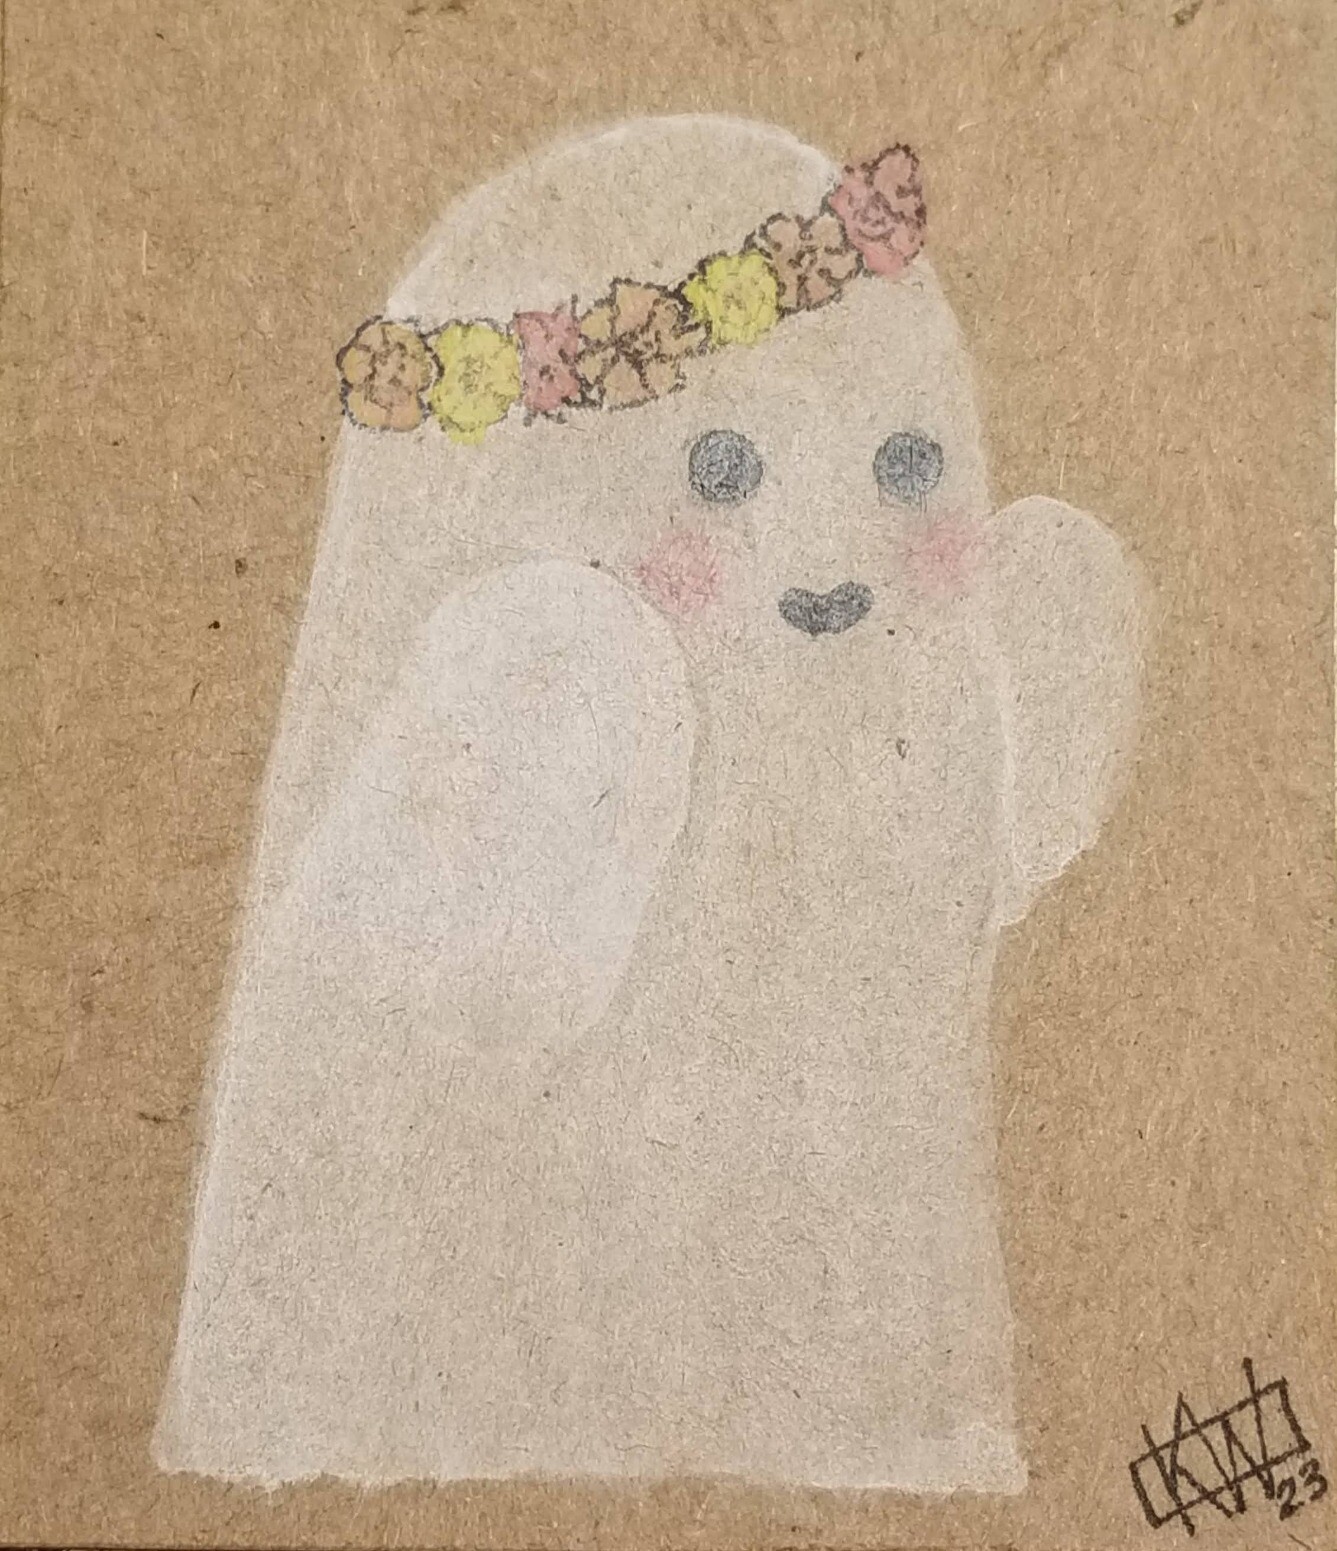
Watercolor & ink on brown cardboard. A smiling, blushing ghost is wearing a flower crown!

‘Art differently’ may not be my favorite tactic, but it is a tactic. Thinner paper, less water, or switching entirely to pencil, charcoal, or markers, will all work better at higher humidity than watercolors will.

Happily, there are other solutions. For example, there are a number of DIY solutions you can add to your water to make the paint dry faster. Read I Started This Heatwave & revel in my meticulous #WatercolorScience. Those experiments were focused on keeping the paper wetter for longer, so several solutions which were considered failures in that experiment could be immensely successful in this one!

After You Paint

Be patient! This goes for your painting as well as you paint pans & palette. Everything needs a long time to dry, preferably undisturbed. Give it all as much time as you can! Some paint companies recommend sticking your paint pans in the freezer if it is too humid for them to dry properly- check with your specific paint manufacturer. Do not freeze paint tubes! Read When Winter Comes Howling In to find out why. Many people will let their paint pans dry as completely as possible before storing them & the paper with those little silica gel desiccant packs to be extra safe from moisture build-up.

We Didn’t Listen!

Something went wrong, & now your paintings are moldy. Don’t cry- that will just make it more humid. You may be able to fix this! Here is a link to the Museum of Modern Art’s guide to fixing molded paintings

Turn A Bug Into A Feature

There are countless wet on wet watercolor techniques, & you will have time to play with all of them on a humid day! There are also many desiccants, such as salt or sand, that will soak up moisture. The world is your oyster- dehydrate that sucker!

I Want YOU To Do #WatercolorScience

I live in an area experiencing a drought, so I can’t test any of these solutions. This is your chance!

Test the various solutions in this article & any tricks you may have of your own, then send me your results & pictures! That way I can write a #WatercolorScience article for humid weather. You can contact me on Ko-Fi or Mastodon. Please include the name/user name you would like me to use so I can give you proper credit! I can’t wait to hear from you!

This is an ongoing series of #WatercolorScience articles about how different types of weather affect your painting, even if you work inside.

Extreme Heat & low humidity: We're Having a Heat Wave & I Started This Heat Wave Freezing Temperatures: When Winter Comes Howling In Humidity & Rain: Lost in a Fog

Get my art on mugs & vinyl stickers in my Shop!

Join us for #KWPrompts, a biweekly art challenge!

Find me on Linktree

  • All pictures posted are my own work.
  • All reviews are my own unpaid & unsolicited opinions.

I’ve spent the last few weeks writing a series of articles on how to paint in extreme heat & low humidity. These two conditions lead to your paint & paper drying fast. They have been making my life very difficult recently! However, I don’t want to neglect my peers from other hemispheres, my beans from other scenes, my legions from other regions… Don’t want to season shame anyone.

So if you want to learn how temperatures over 90°F (32°c) can affect your watercolor painting, various techniques that can help you watercolor in hot & dry weather, as well as a number of solutions you can buy to help you in this endeavor, read Part 1. If you would like to read all about my #WatercolorScience experiments with DIY solutions for hot & dry weather, read Part 2. If “hot & dry” are not your current problems, read on!

How Does Cold Weather Affect Paint?

Watercolors, as the name implies, rely heavily on water. If you have to paint at or below 32°F (0°c) your paints can literally freeze. Tube paints are more susceptible than pan paints, as they have a much higher water percentage. Previously-frozen paints can end up with a grainy texture & are more likely to develop mold. Paint tubes subjected to freezing temperatures are more likely to rupture as the paint expands & contracts.

Paints Are Like Human Beings

There are myriad tips & tricks to weather the cold a little better while painting. Please be aware, painting in extreme cold is much more dangerous than painting in extreme heat. Sitting still for the long periods of time required to paint helps you stay cool on hot days, but that is exactly what you want to avoid in the cold- even above freezing temperatures! The following tips are more appropriate for painting in an unheated studio or out on your porch than on a mountaintop. Please read guides on proper clothing & safety equipment before painting en plein air (fancy art term for outside) in cold weather.

  1. Do not paint in the cold, if you can avoid it. Working in the middle of the day or early evening when it is comparatively warmer will be more comfortable for you & your watercolors.

  2. Work smaller, if you can. Cold paper dries more slowly. If you can finish fast enough, neither you nor your paints will have time to freeze up.

  3. Give your paintings lots of support. The water can freeze as it dries on the page, which can crack if your paper is bowed or bent. The adhesive in tape can fail at low temperatures, so consider using binder clips or a watercolor pad instead.

  4. Recognize the effect freezing will have on your painting, even if it doesn't crack. When you bring it inside it will thaw & need to re-dry, which can make your picture muddy & blurry. This is probably not the time for an extremely detailed masterpiece.

  5. Switch to a different medium entirely! I recently had to switch from watercolors to ink mid-painting as the temperatures climbed so high the “water” part of my colors was evaporating before I could work.

Watercolor & Ink painting of a telephone pole with lots of wires towering over trees. The sun is so low you can't see it. Yellow streaks the sky & pink tinges the underbellies of the heavy grey clouds.

‘Art differently’ may not be my favorite tactic, but it is a tactic. Pencil, charcoal, alcohol-based markers, & oil paints will all work better at lower temperatures than watercolors will.

Happily, there are other solutions. For example:

The Cause Of – And Solution To – All Of Life’s Problems

Alcohol is the famous answer here. Traditionally, painters have added anything from gin to vodka to their water to keep it from freezing. This absolutely works for watercolor paint! Painters have also traditionally added it to themselves “to keep from freezing”, but this is a myth. Drinking alcohol makes you feel warmer, but makes you cold faster. So far as paint is concerned, mix the alcohol in with the water used to dampen your paint pans, brushes, & paper, as well as the water you wash brushes in. ⅓ to ½ alcohol seems to be what most people prefer. This will damage brushes, don’t use your nice new ones for your boozy painting.

PSA: Do Not Use Rubbing Alcohol!

I tried this once, to see if it worked like DIY alcohol inks. It does not! The watercolors gets all gross- on the palette, the page, & in the pan. I ended up washing a fair amount of paint down the drain trying to make sure it was all rinsed out of my paint pans!

DIY Solutions

Putting your palette on an electric heating pad or radiator set to “low” is almost certainly a fire risk, but it is a suggestion I have seen several times. Your metal & ceramic palettes could easily get too hot & your plastic palettes could melt! I wouldn’t even mention it, except it keeps being suggested online & I wanted to emphasize how easily that can backfire.

Warm water. Seriously, try it. Hot water will damage your brushes, but warm water will take longer to ice up.

Turn A Bug Into A Feature

Work with the freezing temperatures to make new, cool art! Many different artists have experimented with intentionally letting their paintings freeze. I tried to do this in my small freezer, it resulted in a muddy mess! People who work outside have gotten very nice results, though.

I Want YOU To Do #WatercolorScience

I hate the cold. I am very dedicated to never being cold again, & I live in an area that doesn’t get very cold even in winter. In other words, I can’t test any of these solutions. This is your chance to shine!

Test the various solutions in this article & any tricks you may have of your own, then send me your results & pictures! That way I can write a #WatercolorScience article for cold weather. You can contact me on Ko-Fi or Mastodon. Please include the name/user name you would like me to use so I can give you proper credit! I can’t wait to hear from you!

This is an ongoing series of #WatercolorScience articles about how different types of weather affect your painting, even if you work inside.

Extreme Heat & low humidity: We're Having a Heat Wave & I Started This Heat Wave Freezing Temperatures: When Winter Comes Howling In Humidity & Rain: Lost in a Fog

Get my art on mugs & vinyl stickers in my Shop!

Join us for #KWPrompts, a biweekly art challenge!

Find me on Linktree

  • All pictures posted are my own work.
  • All reviews are my own unpaid & unsolicited opinions.

In Part 1 of this earthshaking, dream making, groundbreaking blog duology I explained how temperatures over 90°F (32°c) can affect your watercolor painting. I explored various techniques that can help you watercolor in extreme heat, as well as a number of solutions you can buy to help you in this endeavor. Sadly, all the proposed solutions were outside my budget so I could only discuss options instead of testing them. Happily, this week we are talking about DIY options using common household items! Roll up your sleeves & strap on your safety goggles, Part 2 is all about #WatercolorScience!

You Can DIY A Solution

The internet contains a literally infinite amount of DIY art solutions. Some are sensible, some are ridiculous, & some, like a cat flap, are so ridiculously obvious it takes a real genius to point them out. With a small amount of time for testing I chose to limit my experimentation to 5 DIY solutions in 2 groups.

The Solution is in the Water

These solutions were added to the water I used to coat the paper before painting. I tested adding dish soap, ice, vinegar, & witch hazel. Some are meant to make the paint spread out faster, some are meant to make the paper dry more slowly, & some are meant to do both. The solutions make the paint spread faster by destroying the surface tension of the water. If you follow me on Mastodon, you’ve already seen my post explaining surface tension. If not, here we go!

Liquids like water (or, in the example below, oat milk) have a high surface tension; the molecules hold tightly together. That’s why water can ‘mound up’ over the top of a cup before spilling, & why some insects can walk right across the water’s surface. When you add a solution that lowers surface tension, like dish soap, the water molecules stop holding tightly to each other & instead spread themselves out as much as possible, as seen below!

This is the first video I ever made for this blog. It is truly an historic moment in both scientific & cinematic achievement!

Experiment Time!

I brushed on the solution, then painted a green flower shape using the wet-on-wet technique to see how the paint flow & drying rates were affected over time. Vinegar & witch hazel behaved so similarly I only photographed vinegar’s results. Here are my super science results:

4 rectangles of watercolor are each labeled A,B,C, & D. 7 green flower shapes are painted on each one, each labeled with an amount of time from 30 seconds to 7 minutes. The flowers get less blurry as the times get longer.

The ‘A’ card is my control- just plain water. On a day over 90°F (32°c), with no fan, it was bone-dry in 7 minutes.

Dish Soap The ‘B’ card was soapy water. As you can see, the paint disperses faster, just like the food coloring in the video above. However, it also dries a lot faster. It hardly blurs from the 3 minute mark on, whereas plain water was blurry past the 5 minute mark. Considering how many claims I saw online about soap slowing drying time, I was surprised!

Ice Cubes The ‘C’ card is for icy water. Cold water evaporates more slowly. It seems so obvious when I say it out loud! I felt genuinely foolish that this had to be pointed out to me- but it works.

Vinegar or Witch Hazel The ‘D’ card is for vinegar, which behaved exactly like witch hazel in that neither worked as intended. The paint dried noticeably faster, even though at this point the temperature had fallen & the humidity had risen slightly! I declare these both to be complete failures.

Winner: Ice water. Who knew?!

The Solution is in the Paint

This was suggested for watercolor paint that comes in a tube instead of pans, so I could only test it with gouache. I mixed the smallest drop of honey I could squeeze out of the bottle with about 4–5 times the amount of paint using an old supermarket rewards card as a palette knife. It mixed up much more easily than expected! That was the last part that went more easily than expected…

Mixing honey with pigments to make paint is old- we have literally found this mixture in cave paintings from Neolithic times. It was also used in Ancient Egyptian paintings & illuminated manuscripts. People still use it to make their paints today! It makes your colors brighter & shinier. If you use a light-color honey it barely affects your colors! I have seen honey that is practically clear that would be perfect for this. I was using black paint for this experiment, so I didn’t worry about the color of honey.

Rectangles of watercolor paper labeled Gouache (fresh) & Gouache (rehydrated 30 hours later) each has 2 lines labeled A & B. There are smudges along each line, labeled with times 30 seconds to 10 minutes.

This worked much too well. As you can see from my test papers, there is an enormous difference in drying time between the lines.

Line ‘B’ was plain gouache. Whether used fresh out of the tube or left to dry on a palette & rehydrated, it dries on the page inside of 3 minutes. Honeyed gouache just… doesn’t dry at all. 30 hours after the initial experiment, the gouache on the test paper was still tacky – like it usually feels about 2 minutes after painting. The gouache on my palette was still wet! It was shiny & sticky, like fresh tar on a hot street. I have watched videos of people making paint with honey so I know that works, but adding it to already-mixed paint was not the easy solution I was promised by internet randos.

[Friendly Neighborhood Karin here. 60 hours after mixing honey & paint, all the honeyed paint was still wet. 90 hours after mixing, it was still a bit sticky but dry enough that a sealant spray might have worked. I have no sealant spray & so just threw all the honeyed paintings away.]

Winner: Nobody. Well, maybe the ants who find these honeyed paintings in the trash.

Xtreme Climate Conclusions

I’m so pleased that ice water is the clear winner here. What an easy, inexpensive solution. I’ve started dropping one ice cube into each of my 2 water glasses when I start painting on a hot day. Adding a lot of ice (as I did for the ‘C’ card) means that sometimes a bit of ice can stick to your brush & you end up carrying it to the paper, which messes with your water levels. One cube is plenty. Put the rest of your ice into your drinking water- you need to stay hydrated too!

This multi-part extreme weather blog has been a blast! Thank you to everyone who sent me suggestions. I am spending this week doing a series of free watercolor workshops (made possible in this weather by ice water!) See you next week!

This is an ongoing series of #WatercolorScience articles about how different types of weather affect your painting, even if you work inside.

Extreme Heat & low humidity: We're Having a Heat Wave & I Started This Heat Wave Freezing Temperatures: When Winter Comes Howling In Humidity & Rain: Lost in a Fog

Get my art on mugs & vinyl stickers in my Shop!

Join us for #KWPrompts, a biweekly art challenge!

Find me on Linktree

  • All pictures posted are my own work.
  • All reviews are my own unpaid & unsolicited opinions.

Human Beings Are Like Paints

Both react poorly to heat. Dehydration becomes a larger & larger concern as the temperature climbs. Where I live, the temperature rising is generally combined with the humidity falling, which leads to even faster dehydration. As extreme heat waves become more & more common, we are going to have to adapt how we do a lot of things, from growing our food to building our homes. Those are issues I will leave to architects & agricultural experts, however. I will be talking about a different subject: how to watercolor in extreme heat. There’s a lot to talk about because, as you will see-

Paints Are Like Human Beings

There are myriad tips & tricks to weather the heat a little better while painting.

  1. Do not paint in high heat, if you can avoid it. Working early in the day or late at night when it is comparatively less hot & more humid will be more comfortable for you & your watercolors.

  2. Be aware of how much heat your light source is contributing. Painting in direct sunlight (even if you are inside) or under a hot lamp will dry everything out quickly! When it gets over 90°F (32°c) I use my somewhat dim ceiling light to paint as much as possible. I turn my bright/hot lamp on only for mixing color & painting details. The difference it makes is remarkable!

  3. Work smaller, if you can. When it gets over 100°F (38°c), if I absolutely must paint, I won’t paint anything larger than 2 x 3 inches. If the paper is small enough, you can paint fast enough to beat the accelerated drying time!

  4. Add water to the back of the paper, then tape it to your work surface. The paper will stay damp longer if both sides are wet! I have seen this as a tip to avoid the paper rippling, but it also helps keep everything hydrated on hot days.

  5. Add water to everything! Mix your paints a little thinner than usual, wet your paper a little more than usual… You know the poem; “water water everywhere, so let’s all have a drink.” Get yourself a spray bottle with a very fine mist, & you can mist your paper, your paints, even yourself!

  6. Switch to a different medium entirely! I recently had to switch from watercolors to ink mid-painting as the temperatures climbed so high the “water” part of my colors was evaporating before I could work.

Watercolor & Ink painting of a telephone pole with lots of wires towering over trees. The sun is so low you can't see it. Yellow streaks the sky & pink tinges the underbellies of the heavy grey clouds. While ‘art differently’ is certainly a tactic, it may not be the best tactic.

Happily, there are many other solutions. In fact-

You Can Buy A Solution

Several, even. There are a variety of products you can add to either your water or your paint to extend drying time. These products can also make the watercolors more glossy, more transparent, more textured, or more pearlescent, so test before using! I have not tried any of these products & therefore cannot make any recommendations.

Gum Arabic is the hardened sap of Acacia trees. It is a common ingredient in many watercolors already. It will make your paint dry more slowly, giving you more time to work, while also making the paint appear more glossy & transparent. You can mix it into the water or the paint.

Ox Gall Liquid is not vegan. It is a fluid harvested from bovine (usually cattle) gall bladders & mixed with alcohol. Some watercolors use ox gall as an additive ingredient. If having a vegan art kit is something you value, check the ingredients for each individual color- especially shades of black.

Synthetic Ox Gall Liquid is vegan. Both versions of ox gall reduce surface tension, increasing how much & how quickly the paint flows. They both extend drying time. You can mix both into the water or the paint. You only need a few drops! Too much can dull your colors.

Watercolor Medium is a confusing name. All the products in this section are referred to as watercolor mediums. Watercolor Medium, however, is a specific product. It increases the paints’ gloss & saturation, like gum arabic, as well as the speed & extent of the paints’ flow, like ox gall.

Tune In Next Week For The Epic Scientific Conclusion!

I thought this could be done in one week but it is getting long. I’ve been experimenting with adding various solutions to my water & paint to beat the heat. Next week I’ll share the #WatercolorScience I’ve been engaged in!

Photo of a desktop covered in paint palettes, ink pots, brushes, pencil cases, papers, water cups, & other art detritus. This isn’t a mess, it’s science!

Making this a 2-part series means you had an opportunity to share your watercolor wisdom! Thank you to everyone who sent your tips & tricks to me via Ko-Fi & Mastodon! I absolutely loved trying as many as I could that week!

This is an ongoing series of #WatercolorScience articles about how different types of weather affect your painting, even if you work inside.

Extreme Heat & low humidity: We're Having a Heat Wave & I Started This Heat Wave Freezing Temperatures: When Winter Comes Howling In Humidity & Rain: Lost in a Fog

Get my art on mugs & vinyl stickers in my Shop!

Join us for #KWPrompts, a biweekly art challenge!

Find me on Linktree

  • All pictures posted are my own work.
  • All reviews are my own unpaid & unsolicited opinions.

Art supplies are expensive. Artists are broke. Greedy CEOs refuse to pay living wages, forcing people like WGA & SAG-AFTRA members to go on strike. Not everyone has the protection & support provided by union membership – for example, VFX artists do not have a union – so not everyone has access to strike funds, or programs that help union members buy groceries. As millionaire & billionaire executives choose to shut down production over sharing their record-breaking profits, artists are forced to tighten our belts more & more. If you would like to support film & television workers, donate to the Entertainment Community Fund.

Make A Peppermint Palette

This is a very flexible DIY to make a Travel Watercolor Palette, you can work with whatever you have in the recycling bin.

  1. Go raid the recycling bin. We are going to upcycle a whole bunch of different things! I ended up with a tin that held mints, a lot of differently-sized bottle caps, & a bottle that held juice. The bottle was clear, & the back of the label was plain white.

Bottlecaps of various sizes are laid out on a table, next to a juice bottle & various shapes cut out of thin plastic.

  1. The lid of the tin was grey & I wanted something white to mix paints on. I had a juice bottle & some round plastic from inside the bottle caps (that ended up falling apart too easily). I cut the oblong shape (see picture in step 1) out of a juice bottle so the white back of the label makes a good place to mix the paint.

  2. Try different numbers & configurations of bottle caps inside the tin. I have black & white tube watercolors now, & I want to add primary colors in the future, so I needed to have 5 caps fit in the tin. 5 Bottle caps are inside a small lidded tin.  There 2 two pictures showing different possible layouts of bottle caps. An oblong piece of thin plastic is glued inside the lid of one tin.

  3. Any glue would probably work. Use sandpaper to rough up the bottoms of the caps & the inside of the tin a little, to help the glue hold extra well. I used hot glue. Try not to burn your fingers- the tin will get hot!

  4. Add your paint! This works exactly like filling half pans in a store-bought palette. Here is a lovely video explaining different techniques. 5 Bottle caps are inside a small lidded tin. 2 have paint in them- black & white.  An oblong piece of thin plastic is glued inside the lid of the tin.

  5. Dance the Dance of Victory while the paint dries. You just made a travel watercolor palette!

  6. The Last & Most Important Step: Share your creation with me! Send me a picture of your upcycled paint palette on Ko-Fi or Mastodon!

You will need tube watercolors or the ability to make your own paints, which I cannot help you with… yet. 2 Panel Meme:
Panel 1: Mr. Turner painted in black gouache happily points to a mostly empty DIY paint palette, saying "And this is where I'd put my watercolor paint!" 
Panel 2: Angry Mr. Turner glares & shouts "If I had one!" I painted the Mr. Turners in this meme with my new travel palette. I will be upcycling more art supplies in the future, so let me know if there is something you want me to make!

A tin of mint with a hinged lid has blue tape covering the name. Cartoon stickers eye's & a mouth have been added to make an awkward, disconcerted face. This is my paint palette. There is only one like it, because this one is mine.

You Are Now Free to Wander & Paint

The initial idea for this Travel Palette came from The Laws Guide to Nature Drawing and Journaling by John Muir Laws. I had to return the book to the library long before I had gathered all the parts I needed, so I don’t really remember how close my version is to the one in his book. The Laws Guide has quite a long waiting list at my library, for good reason. It is excellent, I highly recommend it. (See below for my policy on book reviews)

Get my art on mugs & vinyl stickers in my Shop!

Join us for #KWPrompts, a biweekly art challenge!

Find me on Linktree

  • All pictures posted are my own work.
  • All reviews are my own unpaid & unsolicited opinions.

What is Alt Text?

‘Alt text’ is short for ‘alternative text.’ Just as the name implies, it is text describing an image that can be used as an alternative to viewing the image it accompanies. Alt text can be viewed in different ways on different sites & apps. Sometimes it pops up when you hover over the picture, sometimes it is displayed below the picture, sometimes it can’t be seen at all but screen readers & refreshable braille displays can still access it for people. Alt text is used by people with visual impairments, trouble focusing on/processing visual information, or weak internet connections. It is used by people, like me, who get headaches & turn the screen brightness so far down we can’t see the pictures clearly. It is used by people who can see the image just fine, but want to read the description anyway. Really, alt text is used by so many people I’m surprised it’s not universal!

If you are still not clear on what alt text is, you can follow this link & hover your cursor over the picture or use your screen reader to access the alt text for the picture below.

BucephalusKnight Look at this photograph, tell me what it is so I can laugh

What Isn’t Alt Text?

Sometimes people use the alt text slot to add the photographer’s name or contact info. Put that near the image- alt text is just for description!

Brevity is the Soul of Alt

Keep it as simple as possible without losing accuracy. Transcribe any text that is in the image.

The wonderful Curator of mastodon.Art explained the basic format for alt text for a single image so neatly I’m just going to quote her directly;

Describe the medium (“An oil painting”) Describe the subject (“of a cottage in a field”) Describe the mood (“the colours are warm and create a cozy atmosphere”).

The alt text for this image could be... SpitFire A watercolor painting of a woman resting her chin on her hand. Her head is on fire. The colours create a cozy atmosphere.

Of course, if you are describing art, you may want to be a bit more descriptive. Depending on the art, you may need to change the format or write a bit more:

C&H Watercolor & Ink 2 panel comic. Panel 1: Title Text reads “Calvin and Hobbes by Watterson and Wanderer”. Angry Calvin is marching with his fist in the air, shouting “I'm not tired! It's only 7:30! This is tyranny! I'm” Panel 2: Sleeping Calvin on the floor, voice bubble has a picture of a bee & says “zzzz.”

Make sure you use proper punctuation. It is especially important to add a period at the end, so the screen reader pauses before moving on to read the next part of the screen.

Every person, every app, & every text reader is different. I have given you the broad strokes, but it is worth looking into how/if the different websites/apps you use employ alt text. If you don’t add alt text, most screen readers will just say ‘image’ so trying to write alt text can make a huge difference in someone’s ability to enjoy your pictures! For more information, see organizations like the American Foundation for the Blind & Web Accessibility Initiative!

When You Can’t Judge A Book By Its Cover

Most book covers – even for audiobooks! – do not include alt text. Book cover design is its own category of art work. It is an integral part of the reading experience. The designers deserve to have their work appreciated by everyone! On 17 July, authors & artists are encouraged to share alt text for their book covers. Readers are encouraged to @ their favorite authors, publishers, etc., & ask them to provide alt text for covers. Be sure to use #AltTextCoverDay!

Mea Culpa

All the pictures shared in all the articles in this blog are mine. They are hosted on my page, where they all have alt text. Somehow I only realized the alt text wasn’t accessible here as I was working on this article. It should work for screen readers now. Please let me know if it does not, & include the program/app/etc you are using to read this, so that I can fix it.

See you next week!

Get my art on mugs & vinyl stickers in my Shop!

Join us for #KWPrompts, a biweekly art challenge!

Find me on Linktree

  • All pictures posted are my own work.
  • All reviews are my own unpaid & unsolicited opinions.

Last week, I wrote about the art & music in Studio Ghibli movies. I also touched on where some of the stories came from, but I didn’t have time to explore another major influence on Studio Ghibli’s work: folklore.

Japanese folklore is woven throughout every one of their movies. The Kodama, or tree-spirits, that populate the forest in Princess Mononoke also feature in The Tale of Genji, written by Murasaki Shikibu over 1,000 years ago. Countless other people have already written about the many, many spirits depicted in Spirited Away. Anyone who’s a fan of Pom Poko might enjoy reading more about the the bake-danuki, who are shape-shifting tanuki. Myths & folklore are stories that have proven they can stand the test of time. It makes sense that people would reuse & rework them as a form of cultural shorthand.

Kodama My work also features Kodama; Lady Murasaki & I are practically twins!

Folklore is a basis for countless modern children’s tales, not just Studio Ghibli ones. It can be used in so many ways & incorporates so many styles! For example…

Some play with the ideas found in folklore. Marcus Ewert & Susie Ghahremani’s picture book She Wanted to Be Haunted is the most Ghibli-like in that regard.

Some tell the story directly, like in The Princess and the Warrior by Duncan Tonatiuh. Some tell it with a few key changes, as Sanjay Patelas does in Ganesha's Sweet Tooth.

Some use folklore as a jumping off point to not only tell a story, but teach about a culture. In Mooncakes by Loretta Seto & Renné Benoit, we get to see how one family celebrates the Chinese Moon Festival as a framing device for telling several traditional Chinese stories about the moon. I can remember my teacher reading A Story, a Story by Gail E. Haley to me when I was so small, so small, so small. This book opens with a page of information about “Spider Stories” & how African storytelling uses repetition for emphasis. It has stuck with me ever since!

Some take characters from folklore & put them into new stories, as in Rabbit Moon by Jean Kim.

Some will retell a familiar story in the style of a different culture, as a way of introducing something new alongside something familiar, as Tomie dePaola does in Adelita

Some do a little of everything with folklore. Some, like Walter Elias Disney, have built empires out of it.

Soot sprites ... and the Soot Sprites rejoiced.

What fantastic folklore have I forgotten? Let me know on Ko-Fi

I would like to reiterate my policy that all reviews are unpaid & unsolicited. I am a preschool teacher who loves to read, I can only go so long without talking about books!

See you next week!

Get my art on mugs & vinyl stickers in my Shop!

Join us for #KWPrompts, a biweekly art challenge!

Find me on Linktree

  • All pictures posted are my own work.
  • All reviews are my own unpaid & unsolicited opinions.

Studio Ghibli is a Japanese animation studio whose name has become synonymous with the enchanting anime style that they have perfected over the years. Studio Ghibli has made dozens of movies, 3 of which are in the top ten highest grossing Japanese movies of all time! The sheer amount of movies, books, clothing, home decor, toys, games, & all other official Ghibli merchandise is mind-boggling. They have a museum. They even have a theme park! The volume of officially-licensed Ghibli things are, however, nothing compared to the overwhelming number of loving tributes that generations of fans have created. Ghibli fans are a worldwide, multigenerational, force of nature. Just researching Ghibli for this post has been difficult as the enormous volume of fanart, fanfic, & other Ghibli-inspired works threaten to bury the original work in each & every search response.

No-Face Mea culpa, mea culpa, mea maxima culpa.

So much has already been written about Studio Ghibli. I could talk all day about co-founder Hayao Miyazaki, who directed most of the studio’s biggest hits. I would give a TED talk on Ghibli’s extensive use of Yokai. I will, someday, probably write an article about the various movies' amazing casts of characters. However, I feel there is one major aspect of every Ghibli movie that always distracts me the most.

Yu-Bird & Boh These 2, clearly, are not distracting at all

The backgrounds in Ghibli movies are practically an extra character in each scene. The landscapes, in particular, are so good! Some of the landscapes & backgrounds are almost as popular as their characters are. An image search of “Ghibli-style landscape” will bring you practically infinite responses.

Watercolor Ghibli landscape I’ve painted Howl’s flower field several times, & I’m not the only one!

These iconic backgrounds are largely the work of Kazuo Oga. He travels to collect reference photos for his work, as well as drawing on inspiration from his childhood. You might think such an accomplished & talented artist is using top-of-the-line materials to make backgrounds for award-winning movies. Nope! He paints them using relatively inexpensive Nicker Poster Colors, which work like gouache. This gives him bold, opaque, yet still water-soluble paint colors to play with.

Digital Ghibli landscape I only have 2 colors of gouache & no poster paint, so I made this one digitally

Kazuo Oga is an inspiration & a reminder that we don’t need to splash out on every expensive artistic accessory being marketed to us- the basics can be enough if you have the skill & dedication. I sit here, side-eyeing my dollar store watercolors, & breathe a sigh of relief! That is a nice reminder, especially as the WGA is forced to continue striking & so we are forced to continue scrimping…

Oh wait, I haven’t even had time to talk about the books! Many Ghibli movies, such as Howl’s Moving Castle & Earwig & the Witch started as books by Diana Wynne Jones, a British novelist. Most of her books are speculative fiction for children. They are also a lot of fun! When I was little I read every one of her books my library had. One that didn’t end up as a Ghibli movie is called Fire & Hemlock, which I liked a lot. I recommend it both for being a fun story & also for name-dropping like 100 other really good books over the course of the narrative.

Oh, & the music! The soundtracks to Ghibli movies are amazing. Joe Hisaishi is a prolific musician who has, among other things, scored many Ghibli movies. I encourage you to look him up wherever you get your music! While you’re there, check out the overwhelming amount of fan-made musical Ghibli tributes. Most of my favorite covers can be found on Cat Trumpet’s album Relaxing Piano: Studio Ghibli Complete Collection.

Teto & Ohm Teto prefers ‘Tori no Hito’, but the Ohm likes ‘Inochi no Namae’ more

It has been one heck of a Ghibli month. I only have 1 day left in the challenge– “Iconic Detail” on the 30th. What iconic detail from Ghibli movies do you like best? Let me know in my Ko-Fi or Mastodon, linked below. See you next week!

Get my art on mugs & vinyl stickers in my Shop!

Join us for #KWPrompts, a biweekly art challenge!

Find me on Linktree

  • All pictures posted are my own work.
  • All reviews are my own unpaid & unsolicited opinions.