K is for Kantha Coaster
I like to have a giant drink on hand when I'm working, as the many rings on my kitchen art table can attest. It's high time I made a coaster to protect the poor table. Happily, I just learned about kantha stitching! Kantha stitching is a method for easily making new things from upcycled & scrap fabric. Last time we talked about sewing I taught you to make a zokin– it's the easiest thing in the world. This sewing project is almost as easy. You don't need fancy fabrics. You don't need skill. Give it a try!
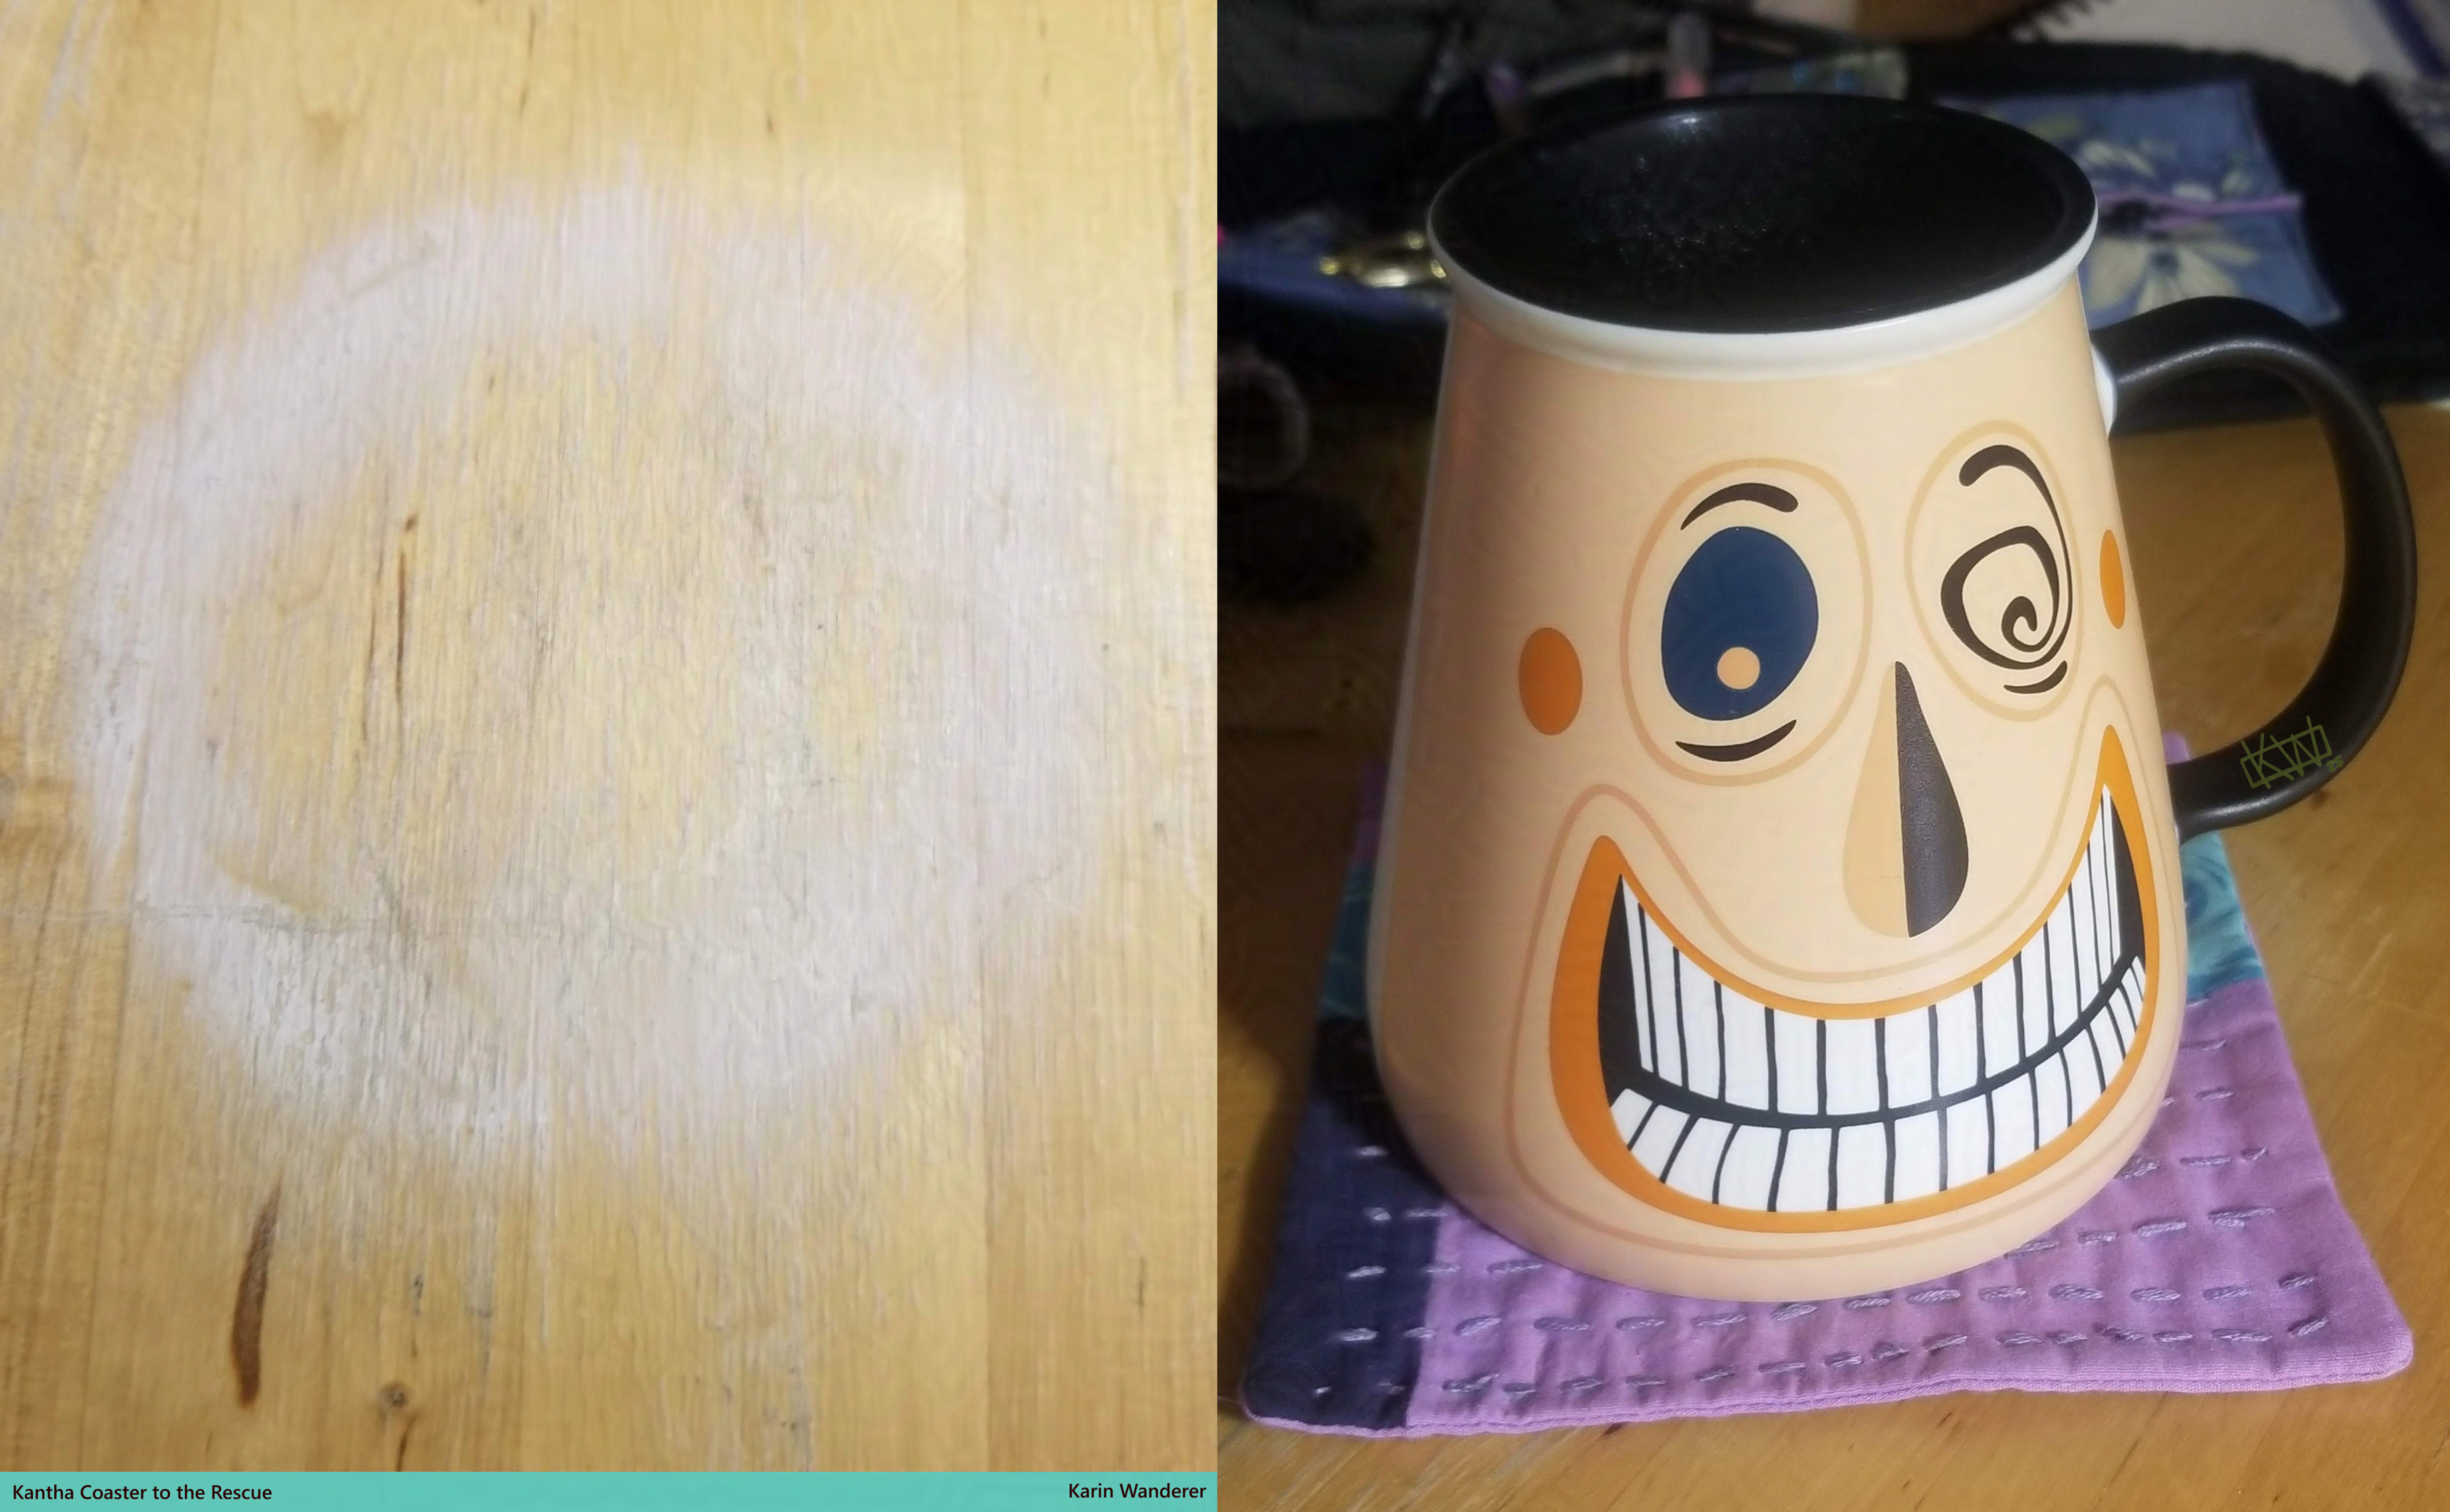 How It Started vs. How It's Going
... Kantha?
'Kantha' is a sewing method from Bangladesh & parts of India. It combines layers of weak, worn cloth to make quilts, coats, rugs, shawls... the list goes on & on. If you tried making a zokin or heard about sashiko, this is a similar concept. The type I am using for the coaster is the simplest version. It is commonly called 'running kantha' because it only uses a loose running stitch. There are many other types, such as nakshi kantha that get very complicated & are very beautiful. I look forward to learning more about them all! Today I am keeping things simple, with a running kantha stitch. Feel free to make yours as complicated as you wish!
Supplies
- Needles & Pins
- Scissors
- Something to mark the fabric, if you want things to be nice & neat.
- Thread: I use both regular thread & embroidery thread in the example pictures, but I have seen lots of other kantha pieces using entirely one type of thread. Use whatever you have, it'll probably work. Things I hand-stitched with dental floss in high school haven't fallen apart yet!
- Fabric: any woven fabric– which is non-stretchy materials like sheets & pillowcases (which is what I used). Since the fabric will be layered and reinforced, it is OK to use cloth that is worn thin- but avoid cloth with holes in it. You can make this by hand or using a sewing machine. If you use a machine or know how to hand sew, you can skip the next sections & go right to “Instructions'
If You Have Never Sewn Before, Read This Section!
To Knot Or Not To Knot
How do you start & end each thread? You can't just leave the ends free & hope for the best. Sometimes you can just anchor the ends with knots, for that it is fastest to tie a quilting knot at the beginning & a finishing knot at the end. Sometimes you don't want a big ugly knot stuck in the middle of your sewing & that is when you use a backstitch.
Running With Stitches
The Running Stitich is the only one you need to know for this project. The Basting Stitch might come in handy, but is not required.
Instructions: It's Just Like Making A Sandwich
1) Assemble Your Ingredients
- Figure out how big your coaster is going to be. I want a 5-ish inch coaster to fit even the most gigantic of my mugs. This means I am starting with a 6 inch square.
- Figure out how many layers you need. My fabric for this project is worn out scraps of lightweight fabrics, so 3 layers make a coaster that will absorb light spills/condensation without being bulky. (3 layers means a top, a bottom, & a lining.)
- You won't really see the lining, so don't waste your best-looking fabric here. I used a square from an old white shirt that got stained beyond repair.
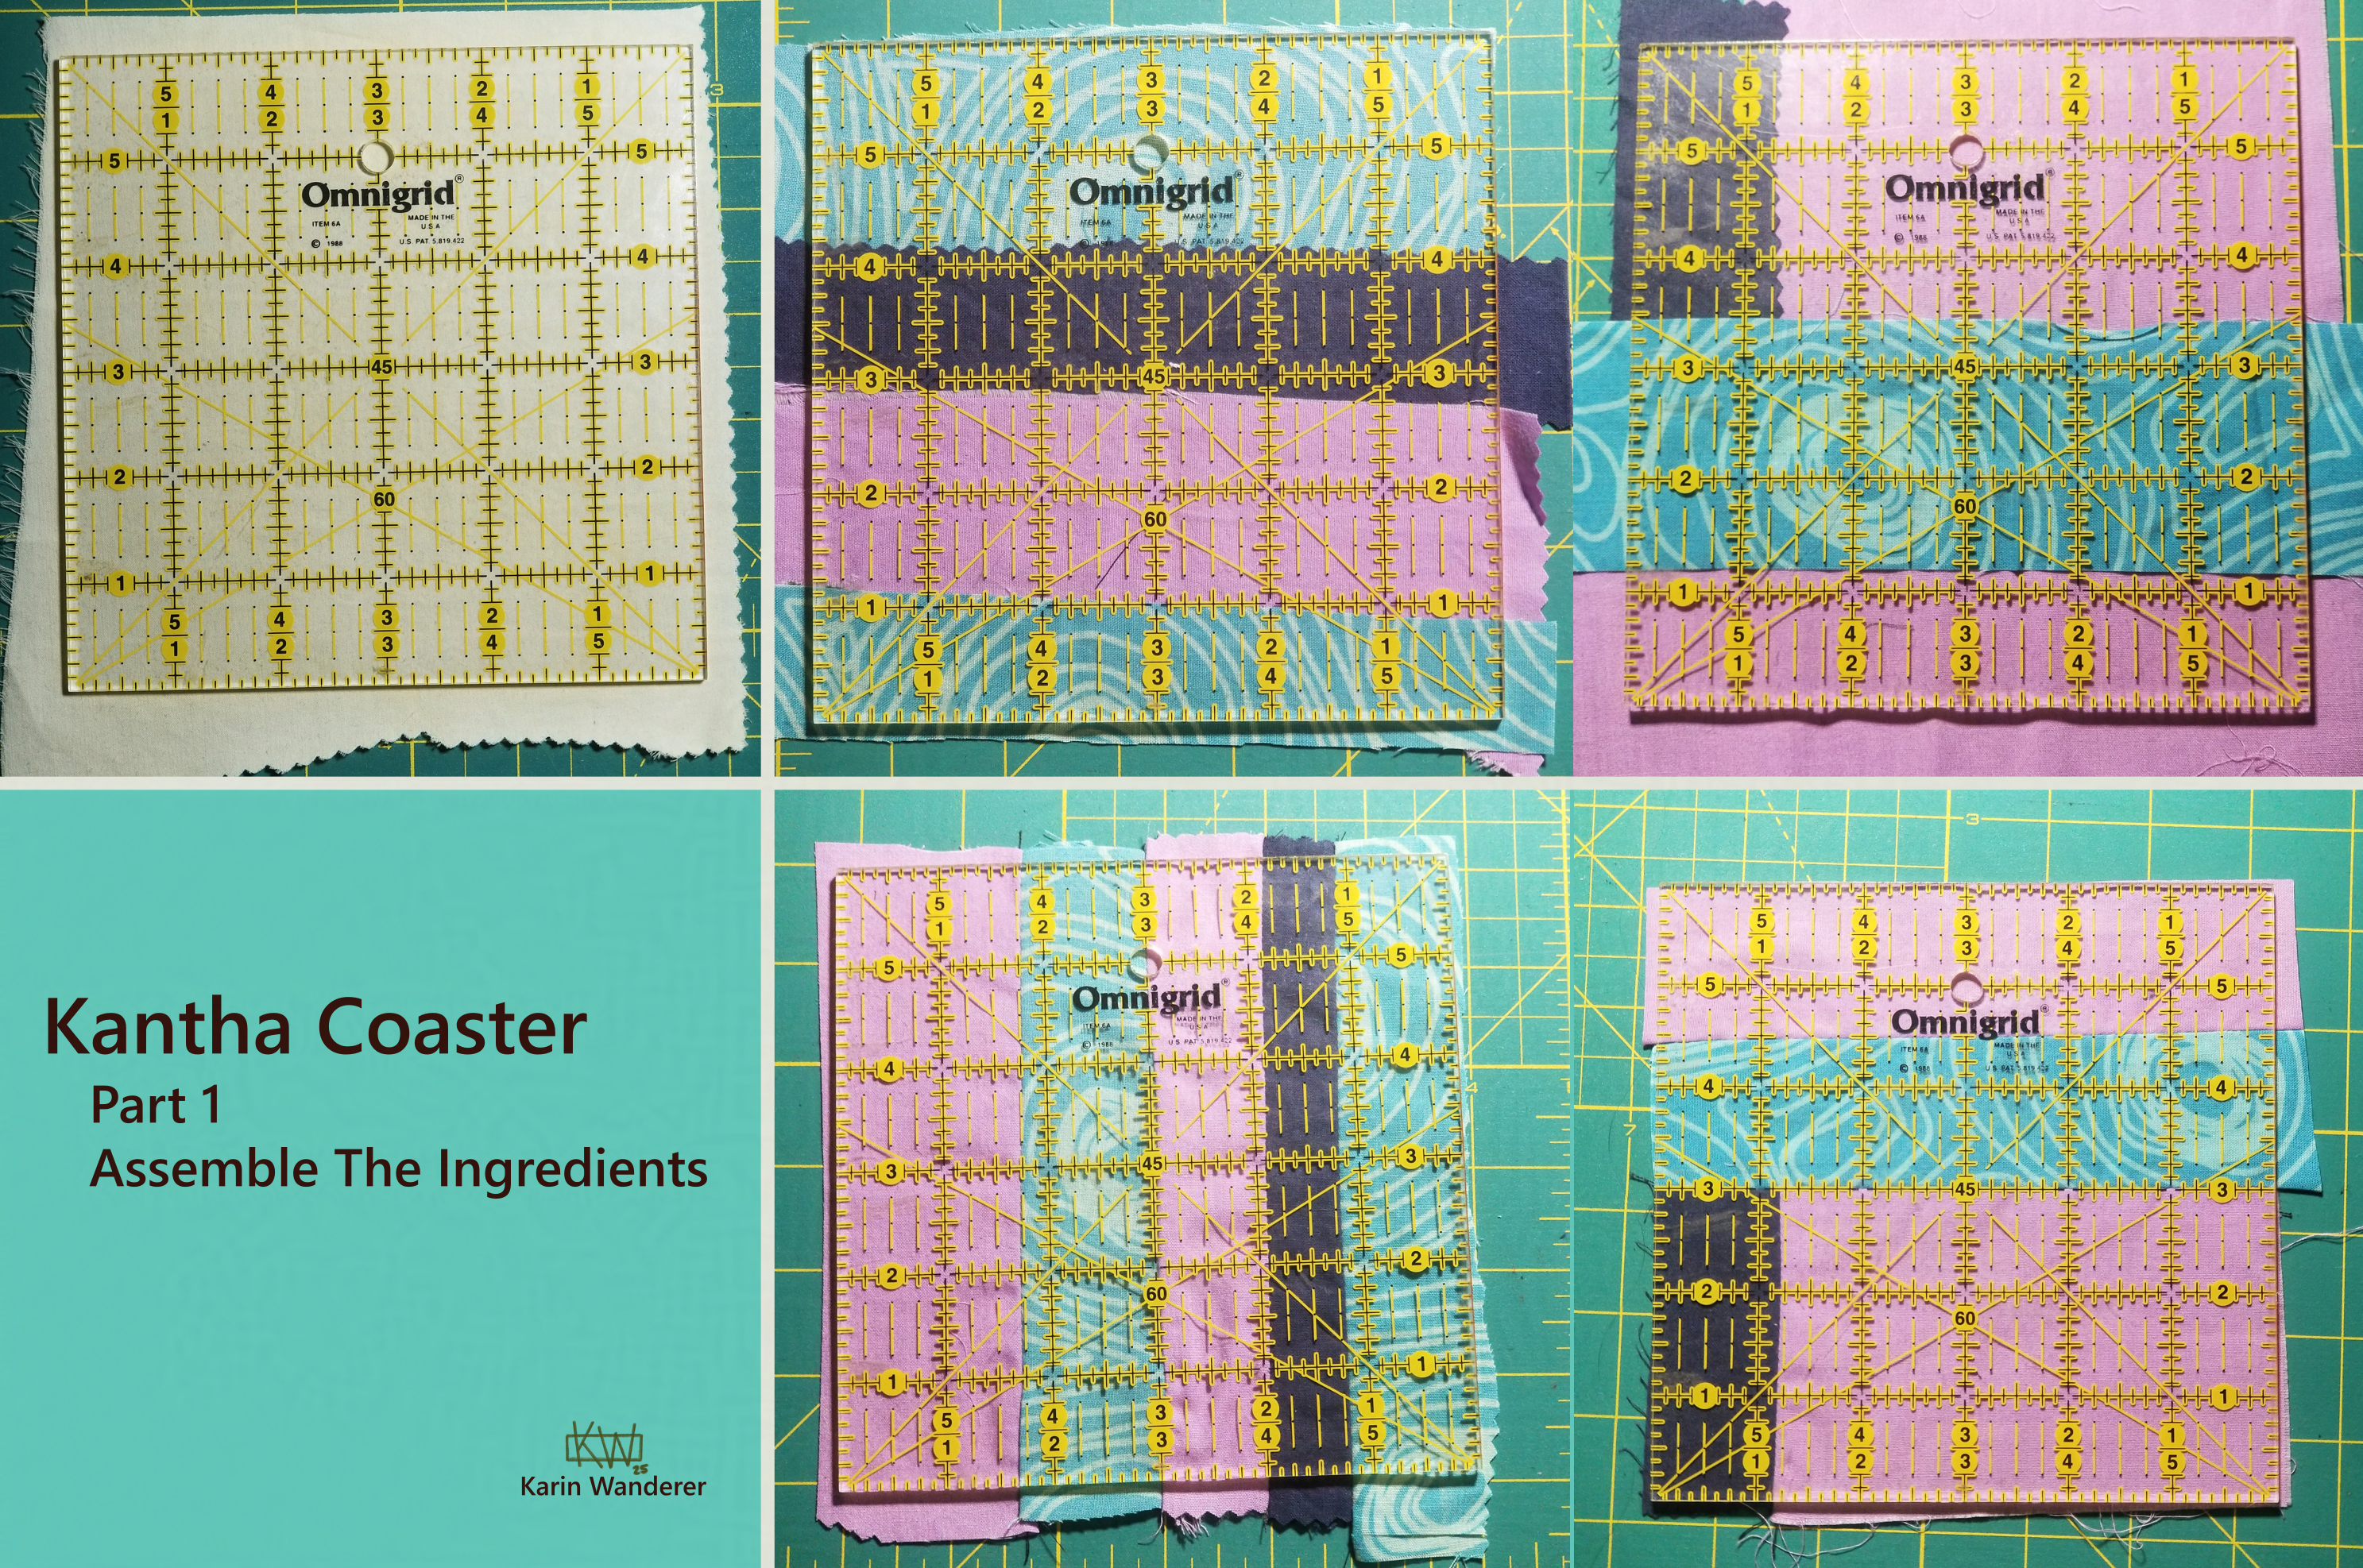
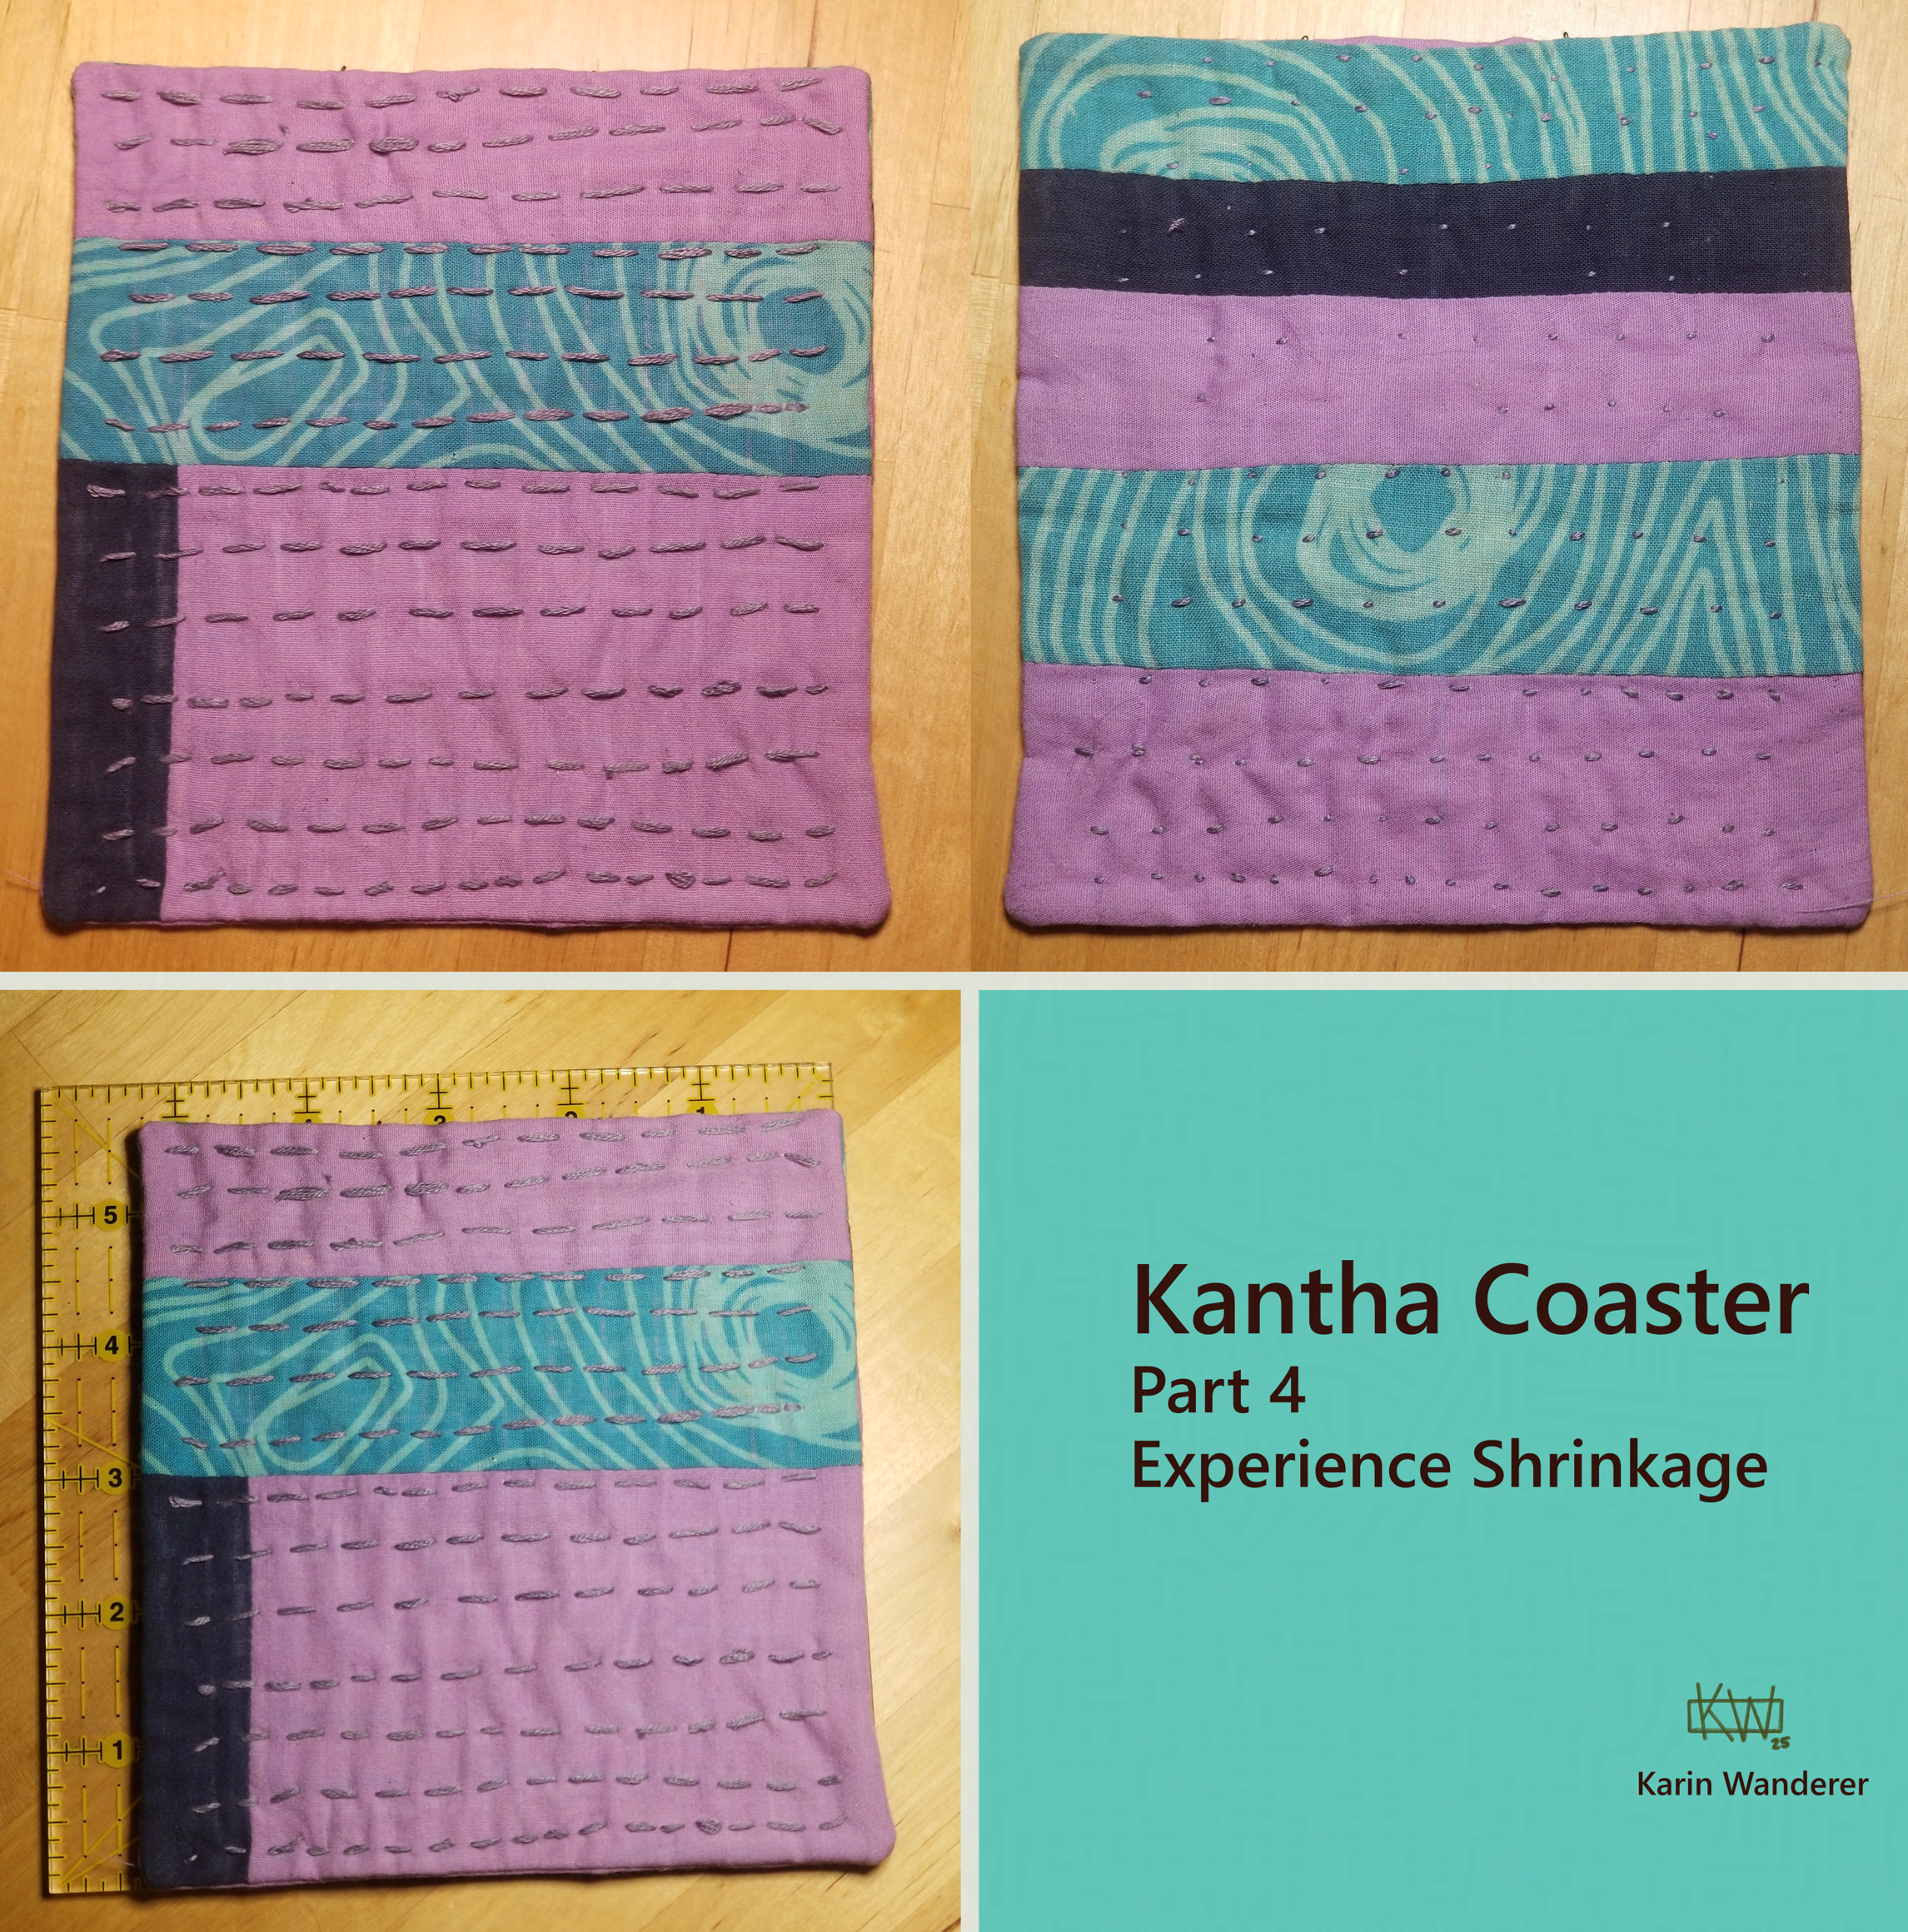
- The top & bottom are made from scraps of old worn out sheets. As seen in the top 2 examples, above: you can just lay the scraps out flat, pin or baste them in place, then start the kantha stitching. That is the traditional method, & what I had originally intended to do. If you do this method you will be sewing all the layer together at once with the kantha stitch, so you can skip section 2. You can also sew the scrap together like a contemporary quilt, as demonstrated in the bottom 2 examples. In this case the kantha stitching will strengthen the coaster.
- Arrange your scraps however you like, use as many or as few as makes you happy. Try to avoid mixing very thick fabrics with very thin ones; if things are too uneven you drink will fall over!
2) Make The Sandwich
- Lay out the top & bottom, right sides together. This means you lay out the top with the stitches down. Then the bottom on the top with the stitches up. Lay out the lining fabric on top of them
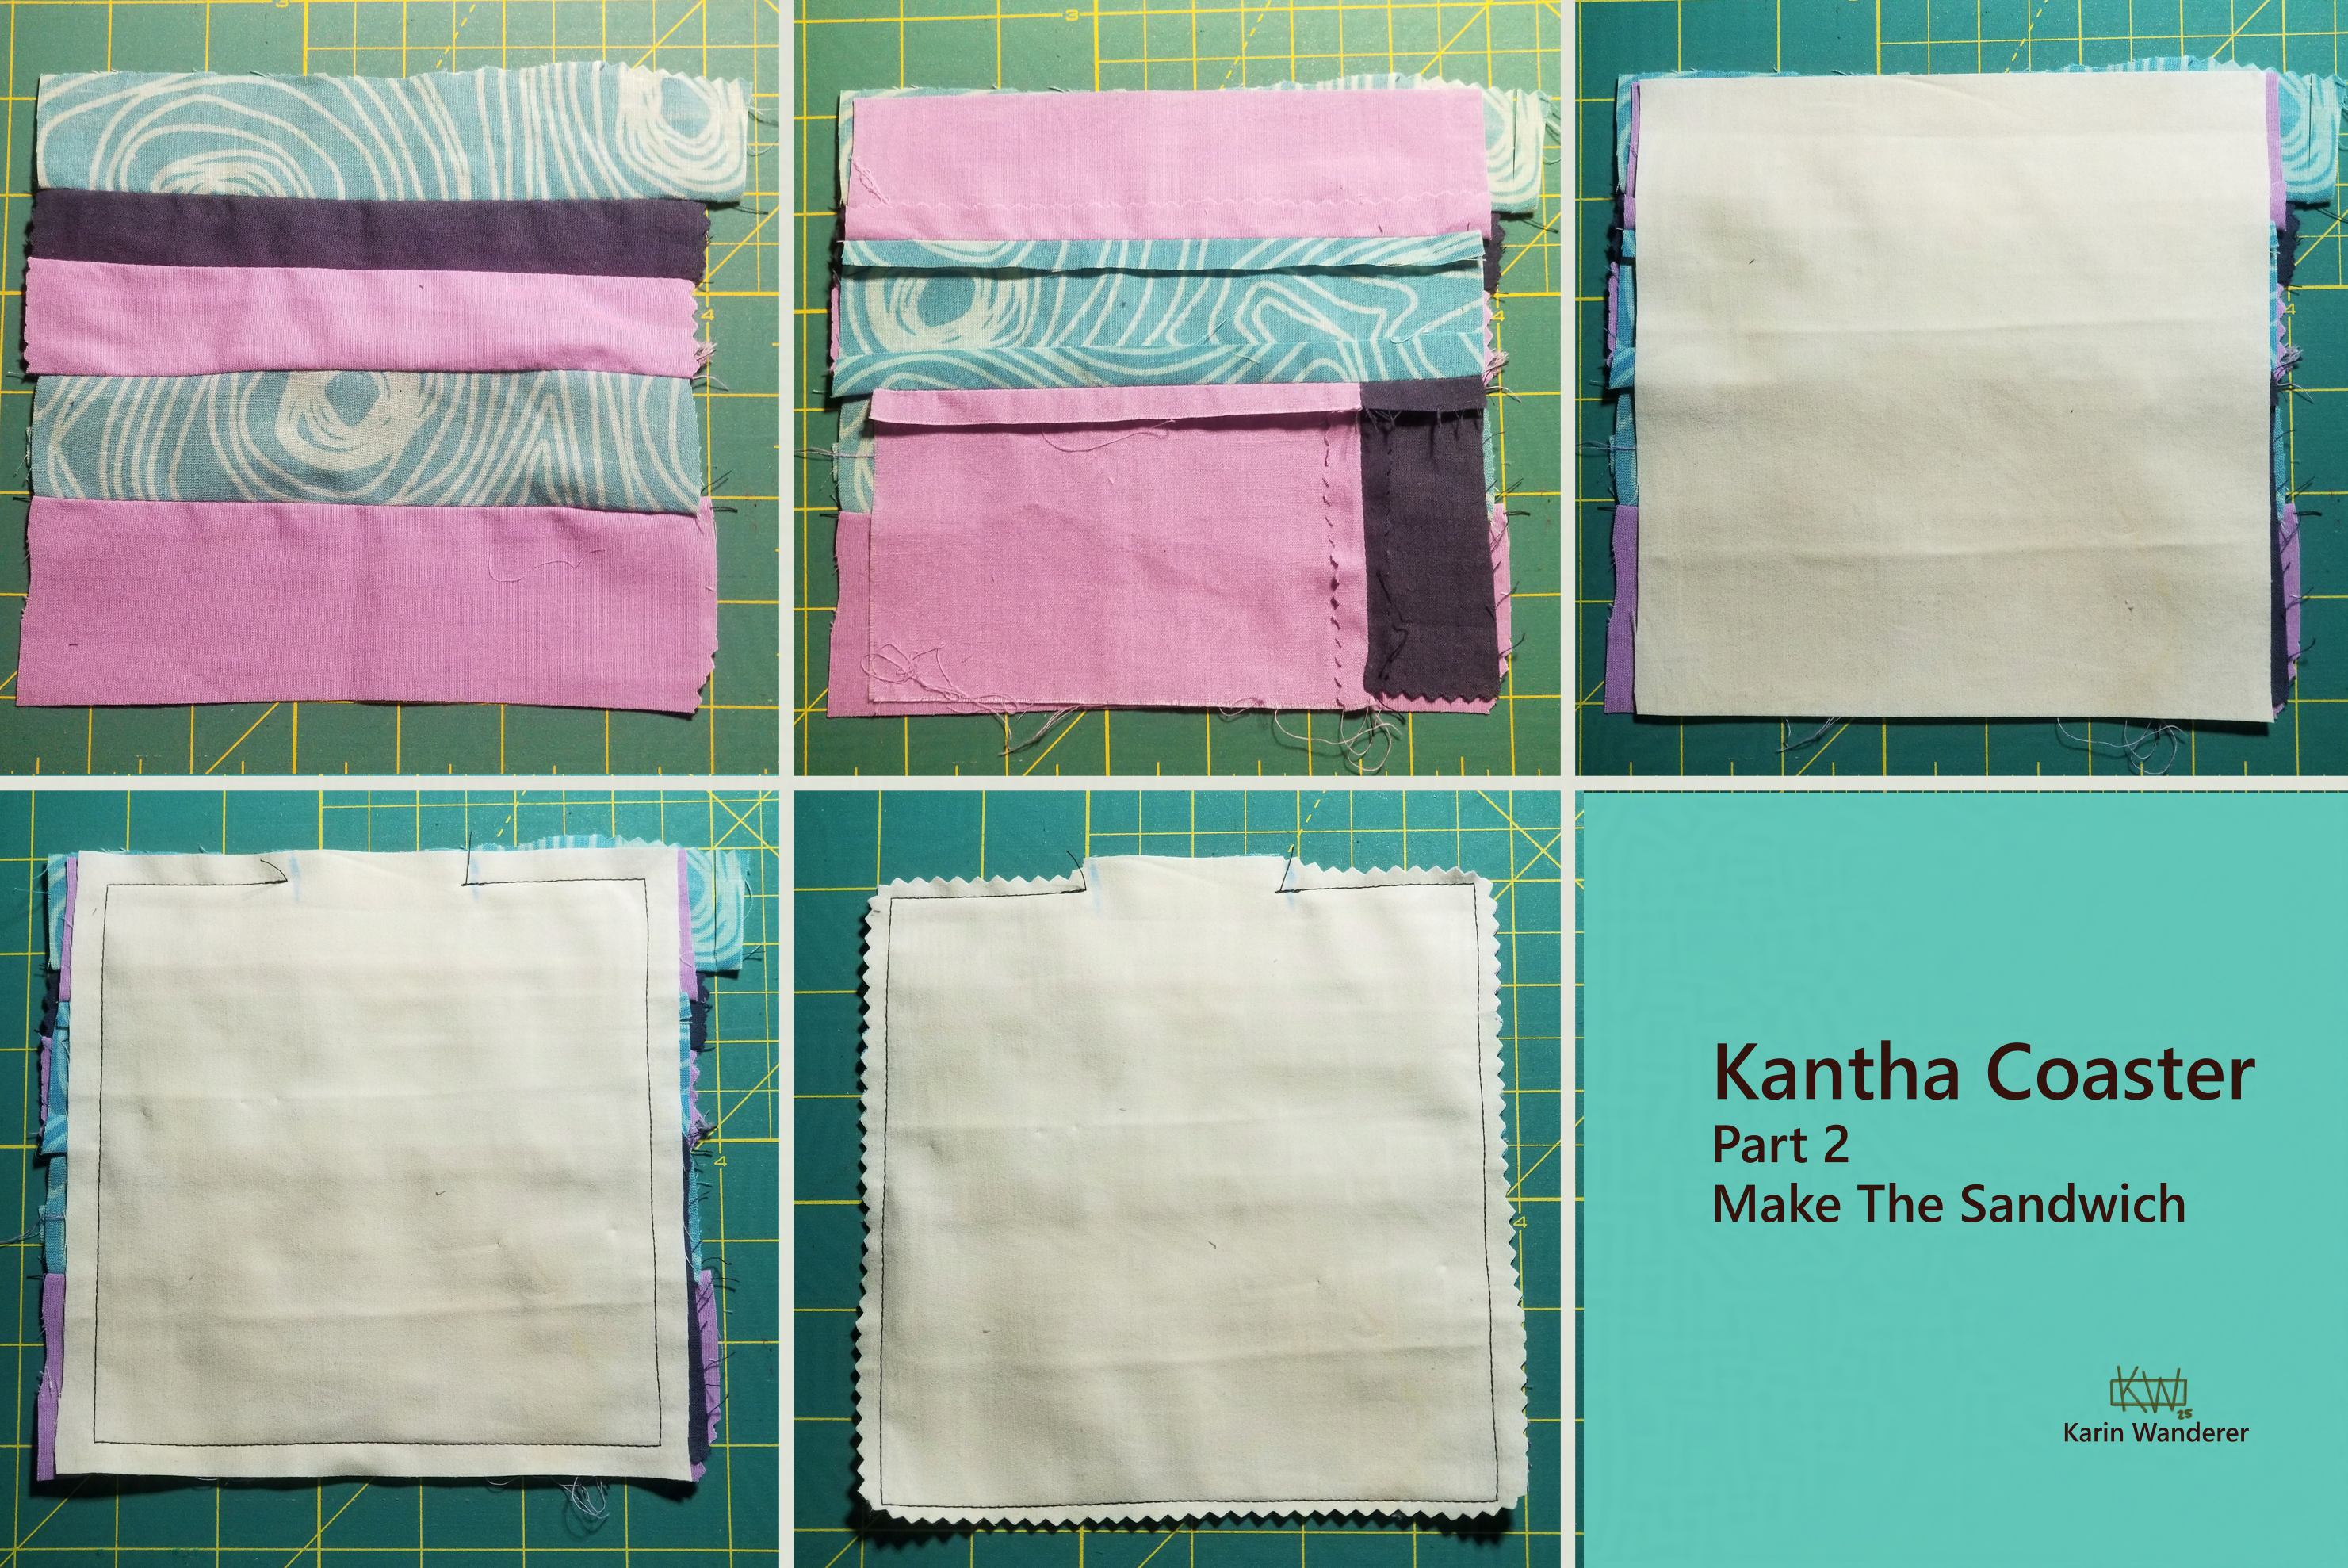
- You can sew this next part with a machine or by hand. If using a machine, follow its instructions. By hand, start with a quilting knot, sew almost all the way around, & end with a finishing knot. Leave a 2 inch gap in your sewing. Trim the edges & corners, but do not cut into your stitches .
3) Flip The Sandwich Inside Out Just like Mother used to make.
- Use the gap you left in your sewing to turn the coaster inside out, hiding the seam you just sewed inside.
- Pin or baste to keep the layers of fabric in place while you sew. Draw a grid if you like things extra-neat.
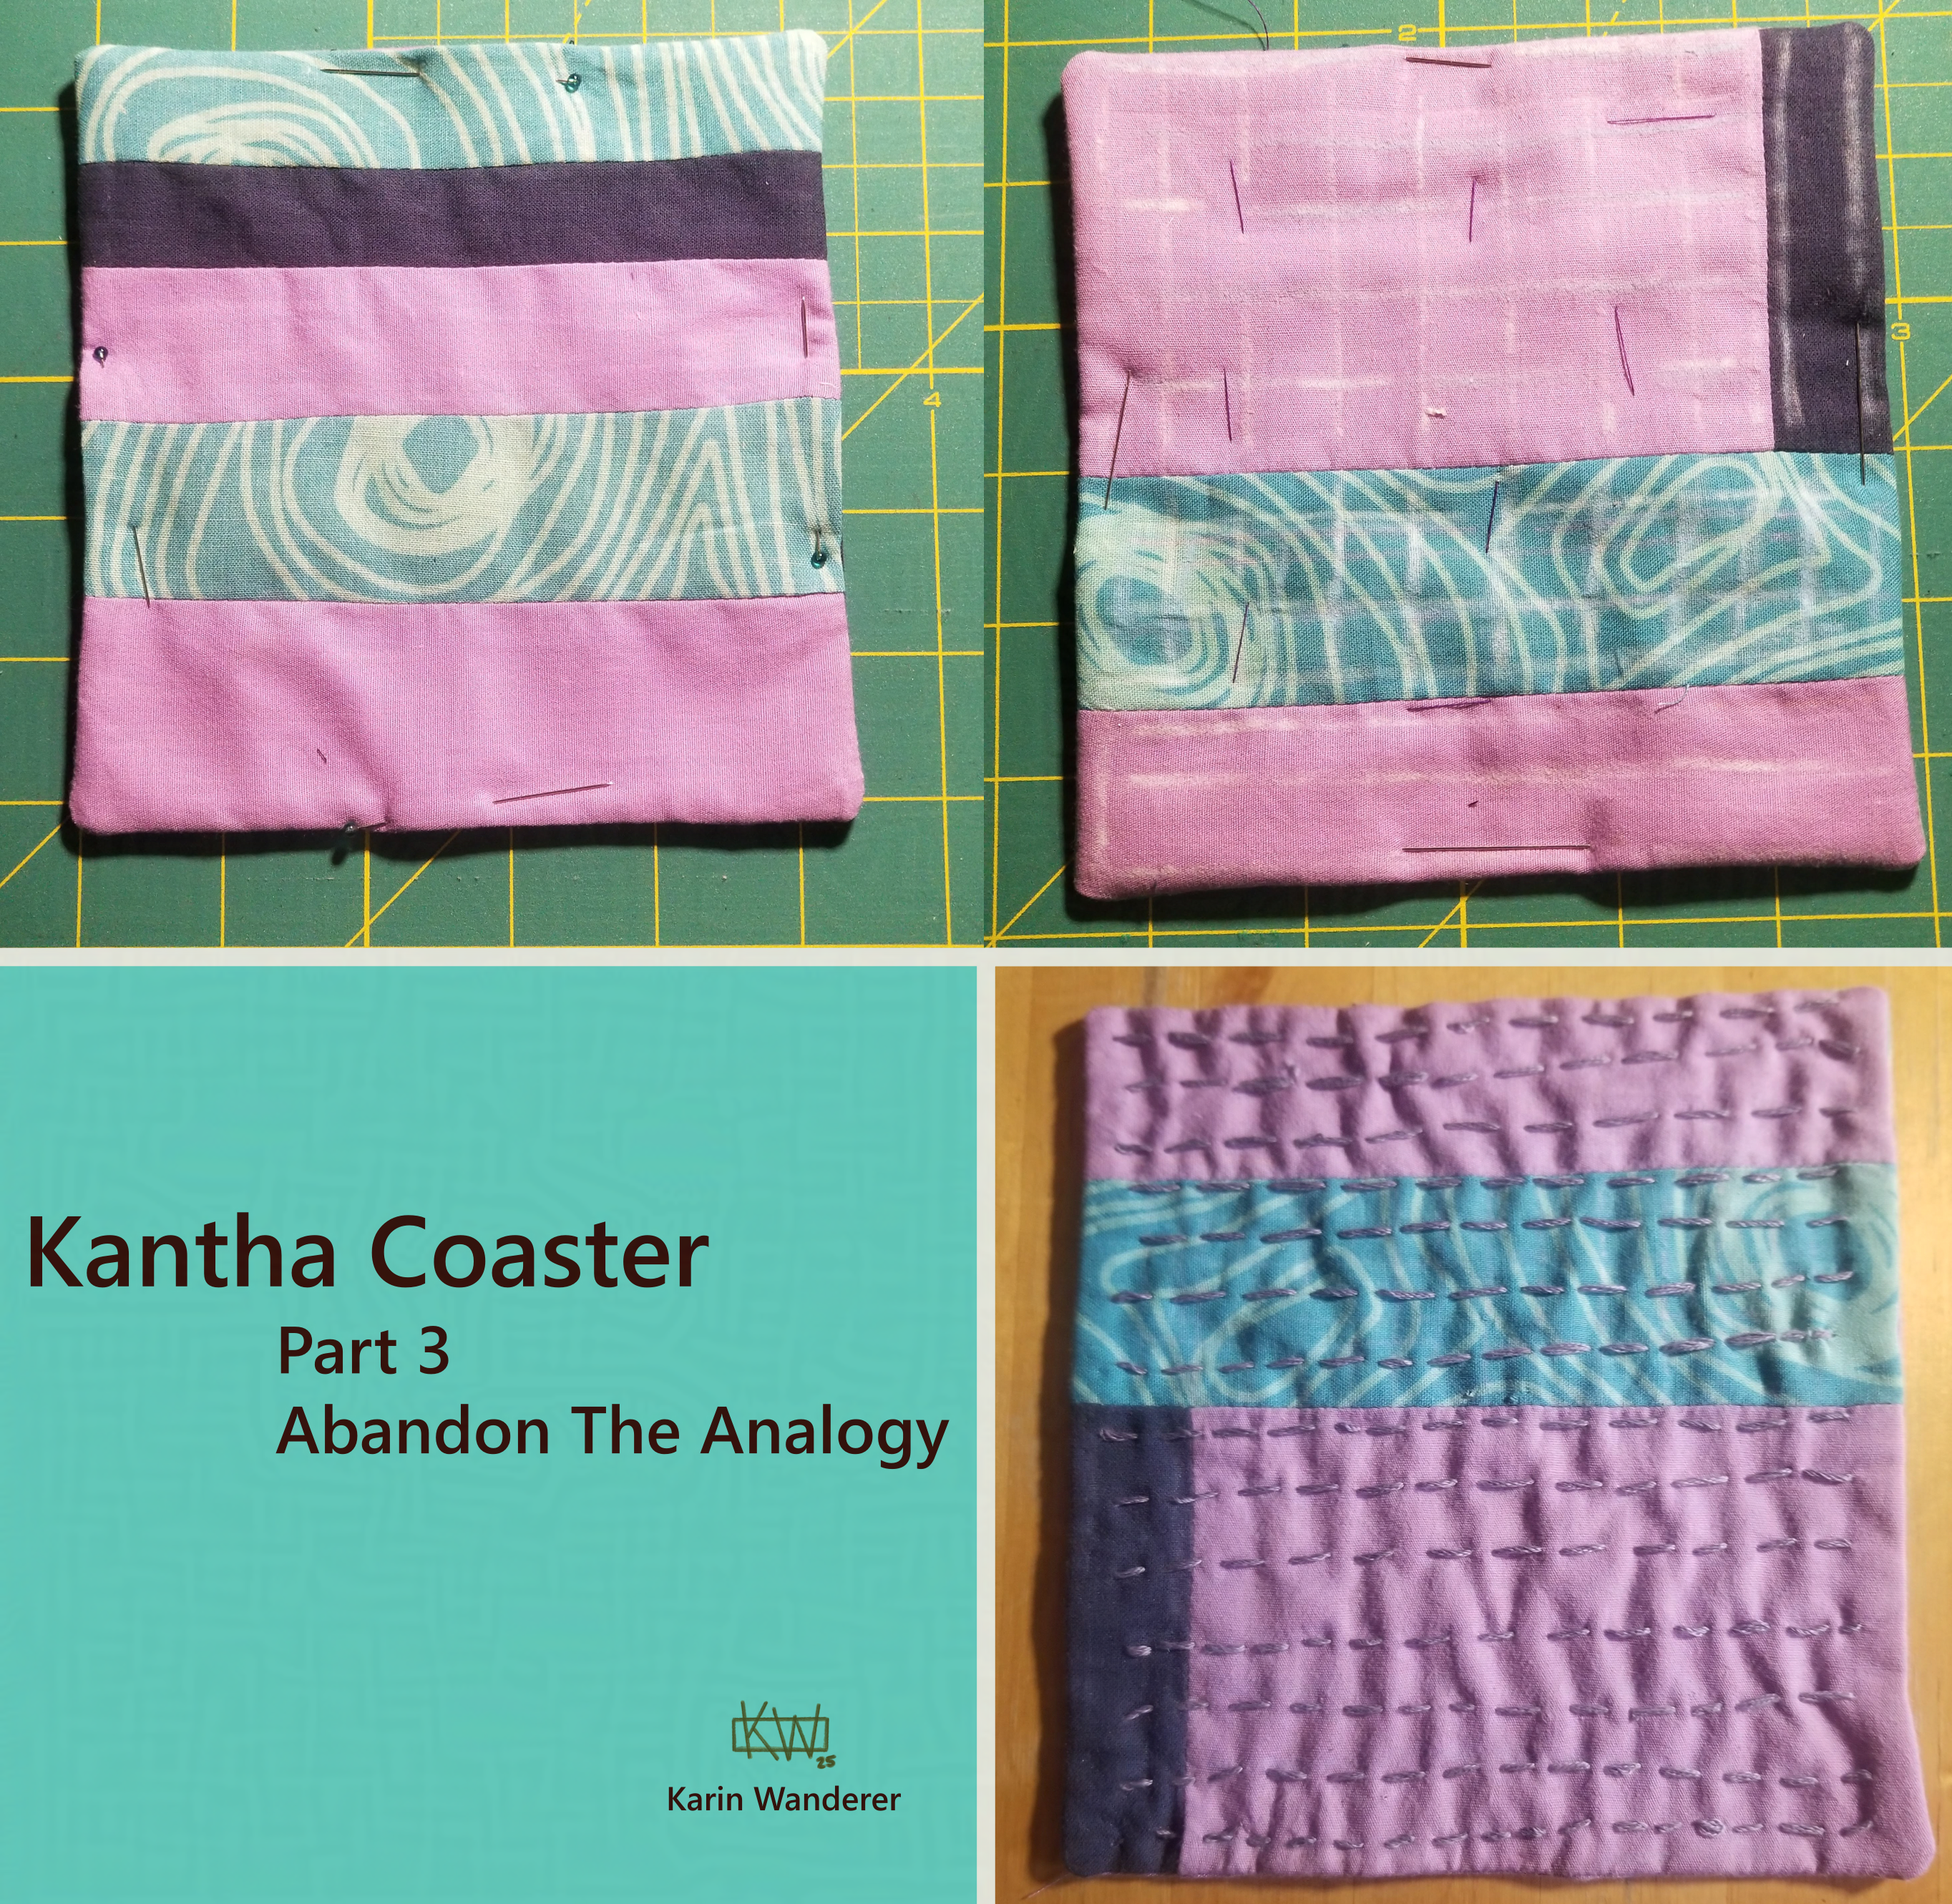
- Start your running kantha stitch. Make sure you sew along the outer edge to close the gap you used to turn the fabric right sides out. Since you will be able to see both sides of your stitching for this part, use a backstitch to anchor your thread. Then get stitching!
4) Experience Shrinkage Before adding horizontal lines of kantha stitching, this was a 5.5 inch square. Afterwards, it has shortened by about a quarter-inch. It's not a big different on a coaster, but it will have a larger effect on larger projects. Something to keep in mind!
5) Revel In The Joy of Creating Something New I started this project to practice using a palm thimble. I made the thimble myself, & now you can, too- I made a tutorial! I absolutely love both the thimble & the coaster. My favorite part is that this is a project that can be scaled to any size. I'm currently working on a scarf using kantha stitching and I'm considering a blanket or shawl after that. I find sewing very soothing (probably because I get to stab something over & over) so I keep thinking of larger & larger projects.
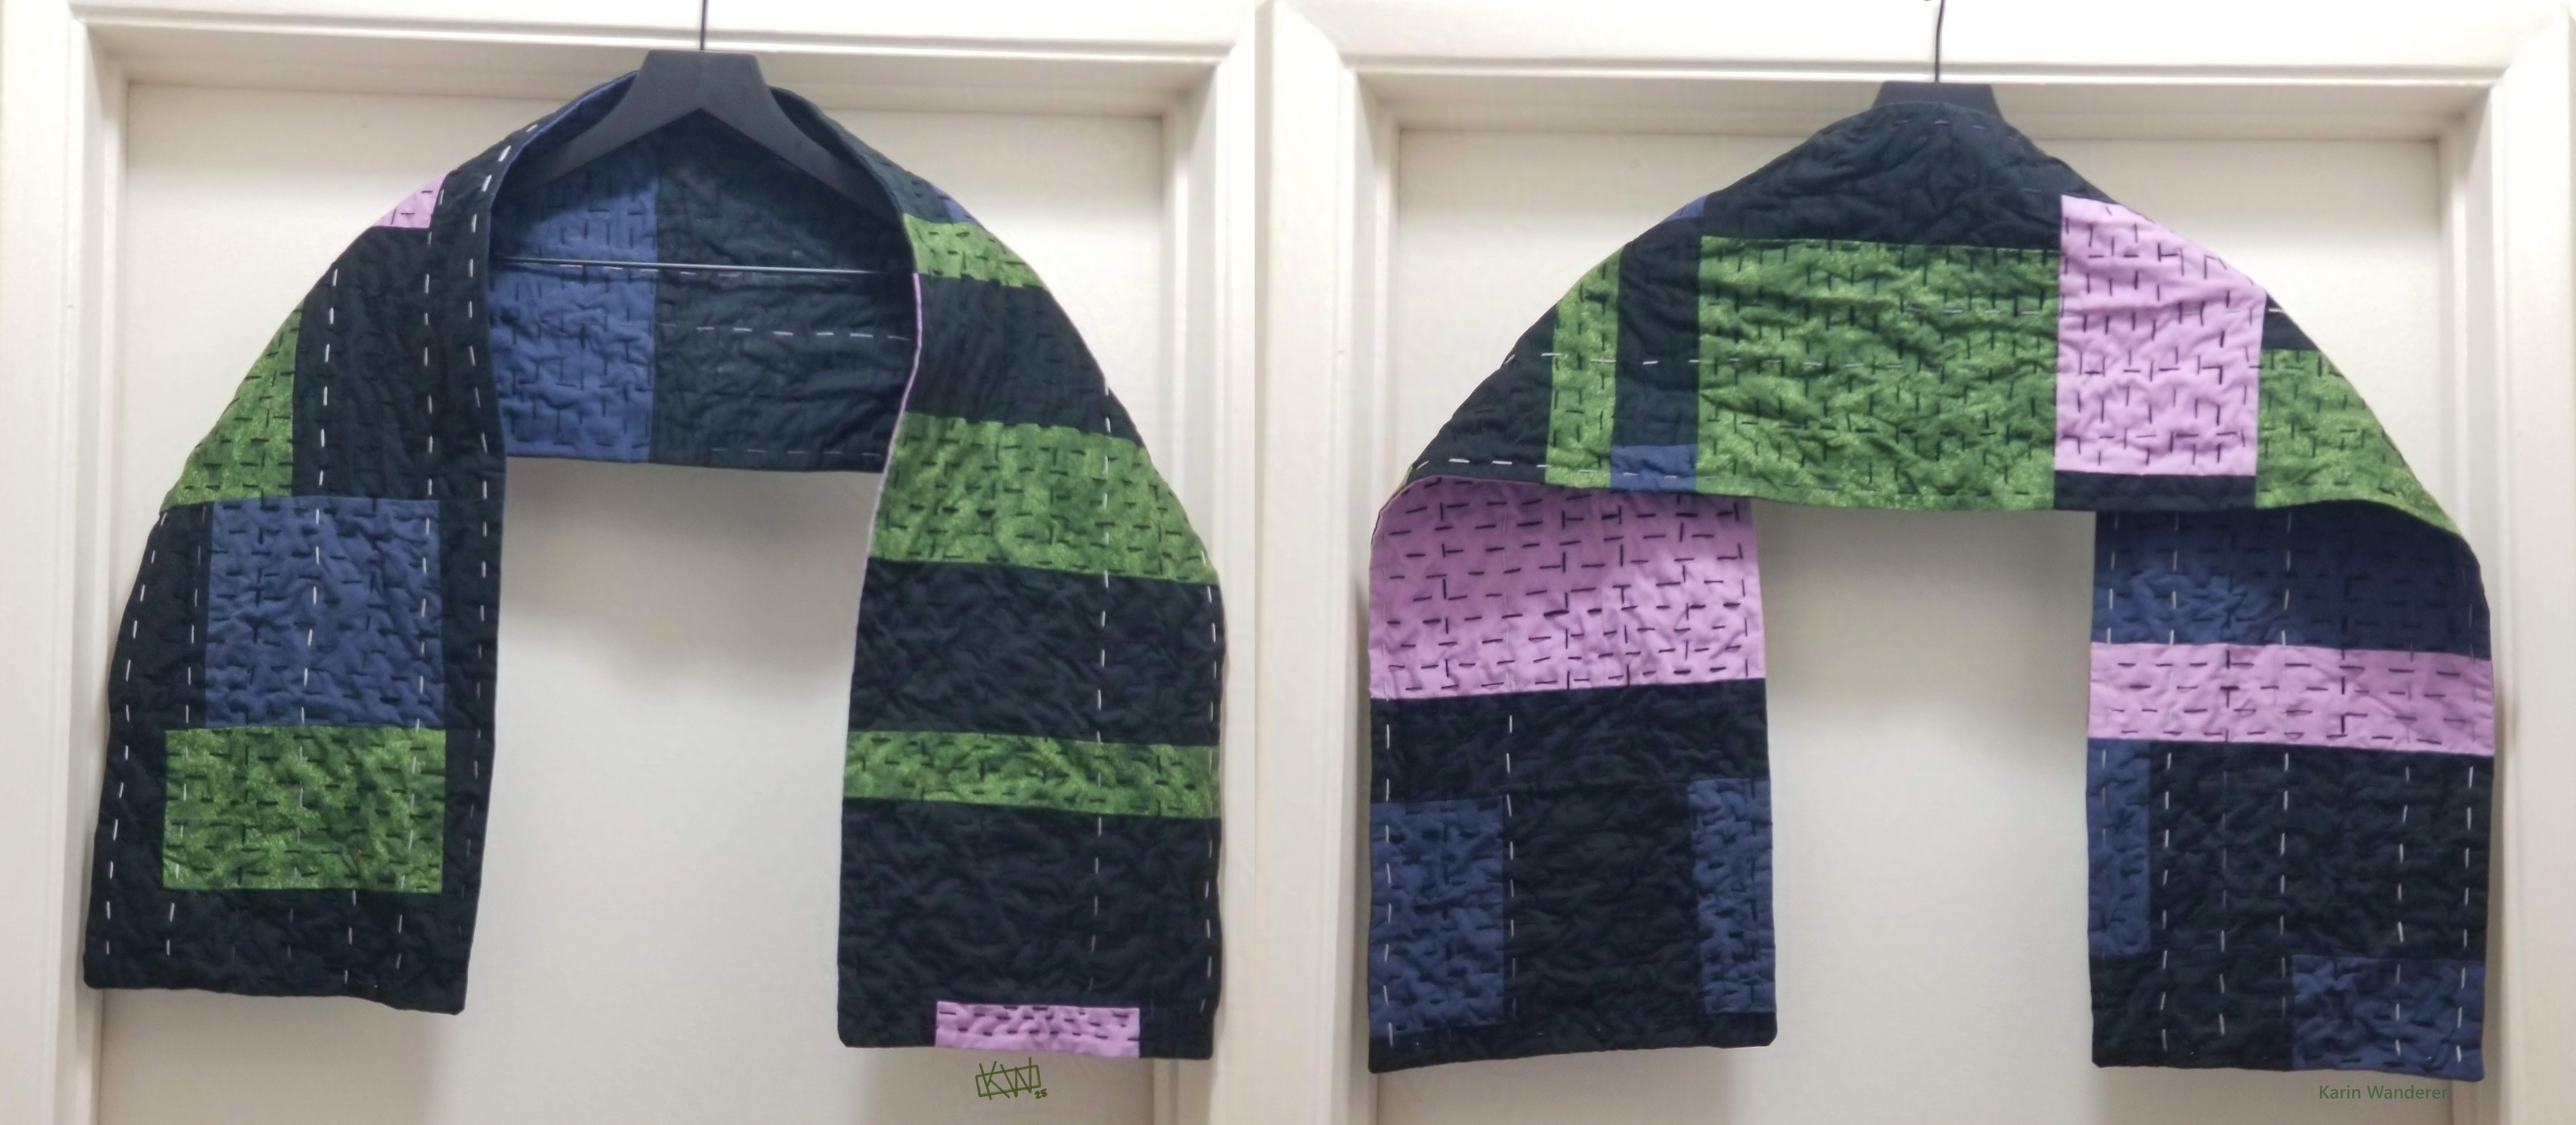 Scarf is finished! Now I'm starting on a shawl...
Are you going to make something like this? Do you want to see me make something else? Let me know on Mastodon or Ko-Fi!
Have a fantastic day, draw something for my art challenge, see you next week!
Get my art on mugs & vinyl stickers in my Shop!
Donate to support my works & get cool perks on Ko-Fi
Join us for #ArtABCs, the best art challenge on the internet!
- All pictures posted are my own work.
- All reviews are my own unpaid & unsolicited opinions.