H is for Housekeeping
Those of us in the northern hemisphere are rolling right into spring, and in this particular part of that hemisphere we are bracing ourselves for taxes & tariffs & indulging in a bit of stress spring cleaning. This week I am making zokin, a cleaning supply I only recently heard about but am now completely obsessed with. This is a very easy sewing project. You don't need fancy supplies. You don't need skill. You could pick up a hotel sewing kit for the first time in your life & end up with a functional zokin.
... Zokin?
'Zokin' is Japanese for 'cleaning cloth'. Zokin are amazing! Before I made these I never would have imagined that putting a few stitches into the the cut-up rags I was already using to clean would make them better cleaning rags, but they absolutely do. This is part of my goal to use fewer paper towels. It is working! The same paper towel roll has been in my kitchen for almost 2 months now. Making zokin has become my recurring “sick day” project. I can make them when I'm trapped in an exhausted brain fog & even if they come out a bit wonky they still work great!
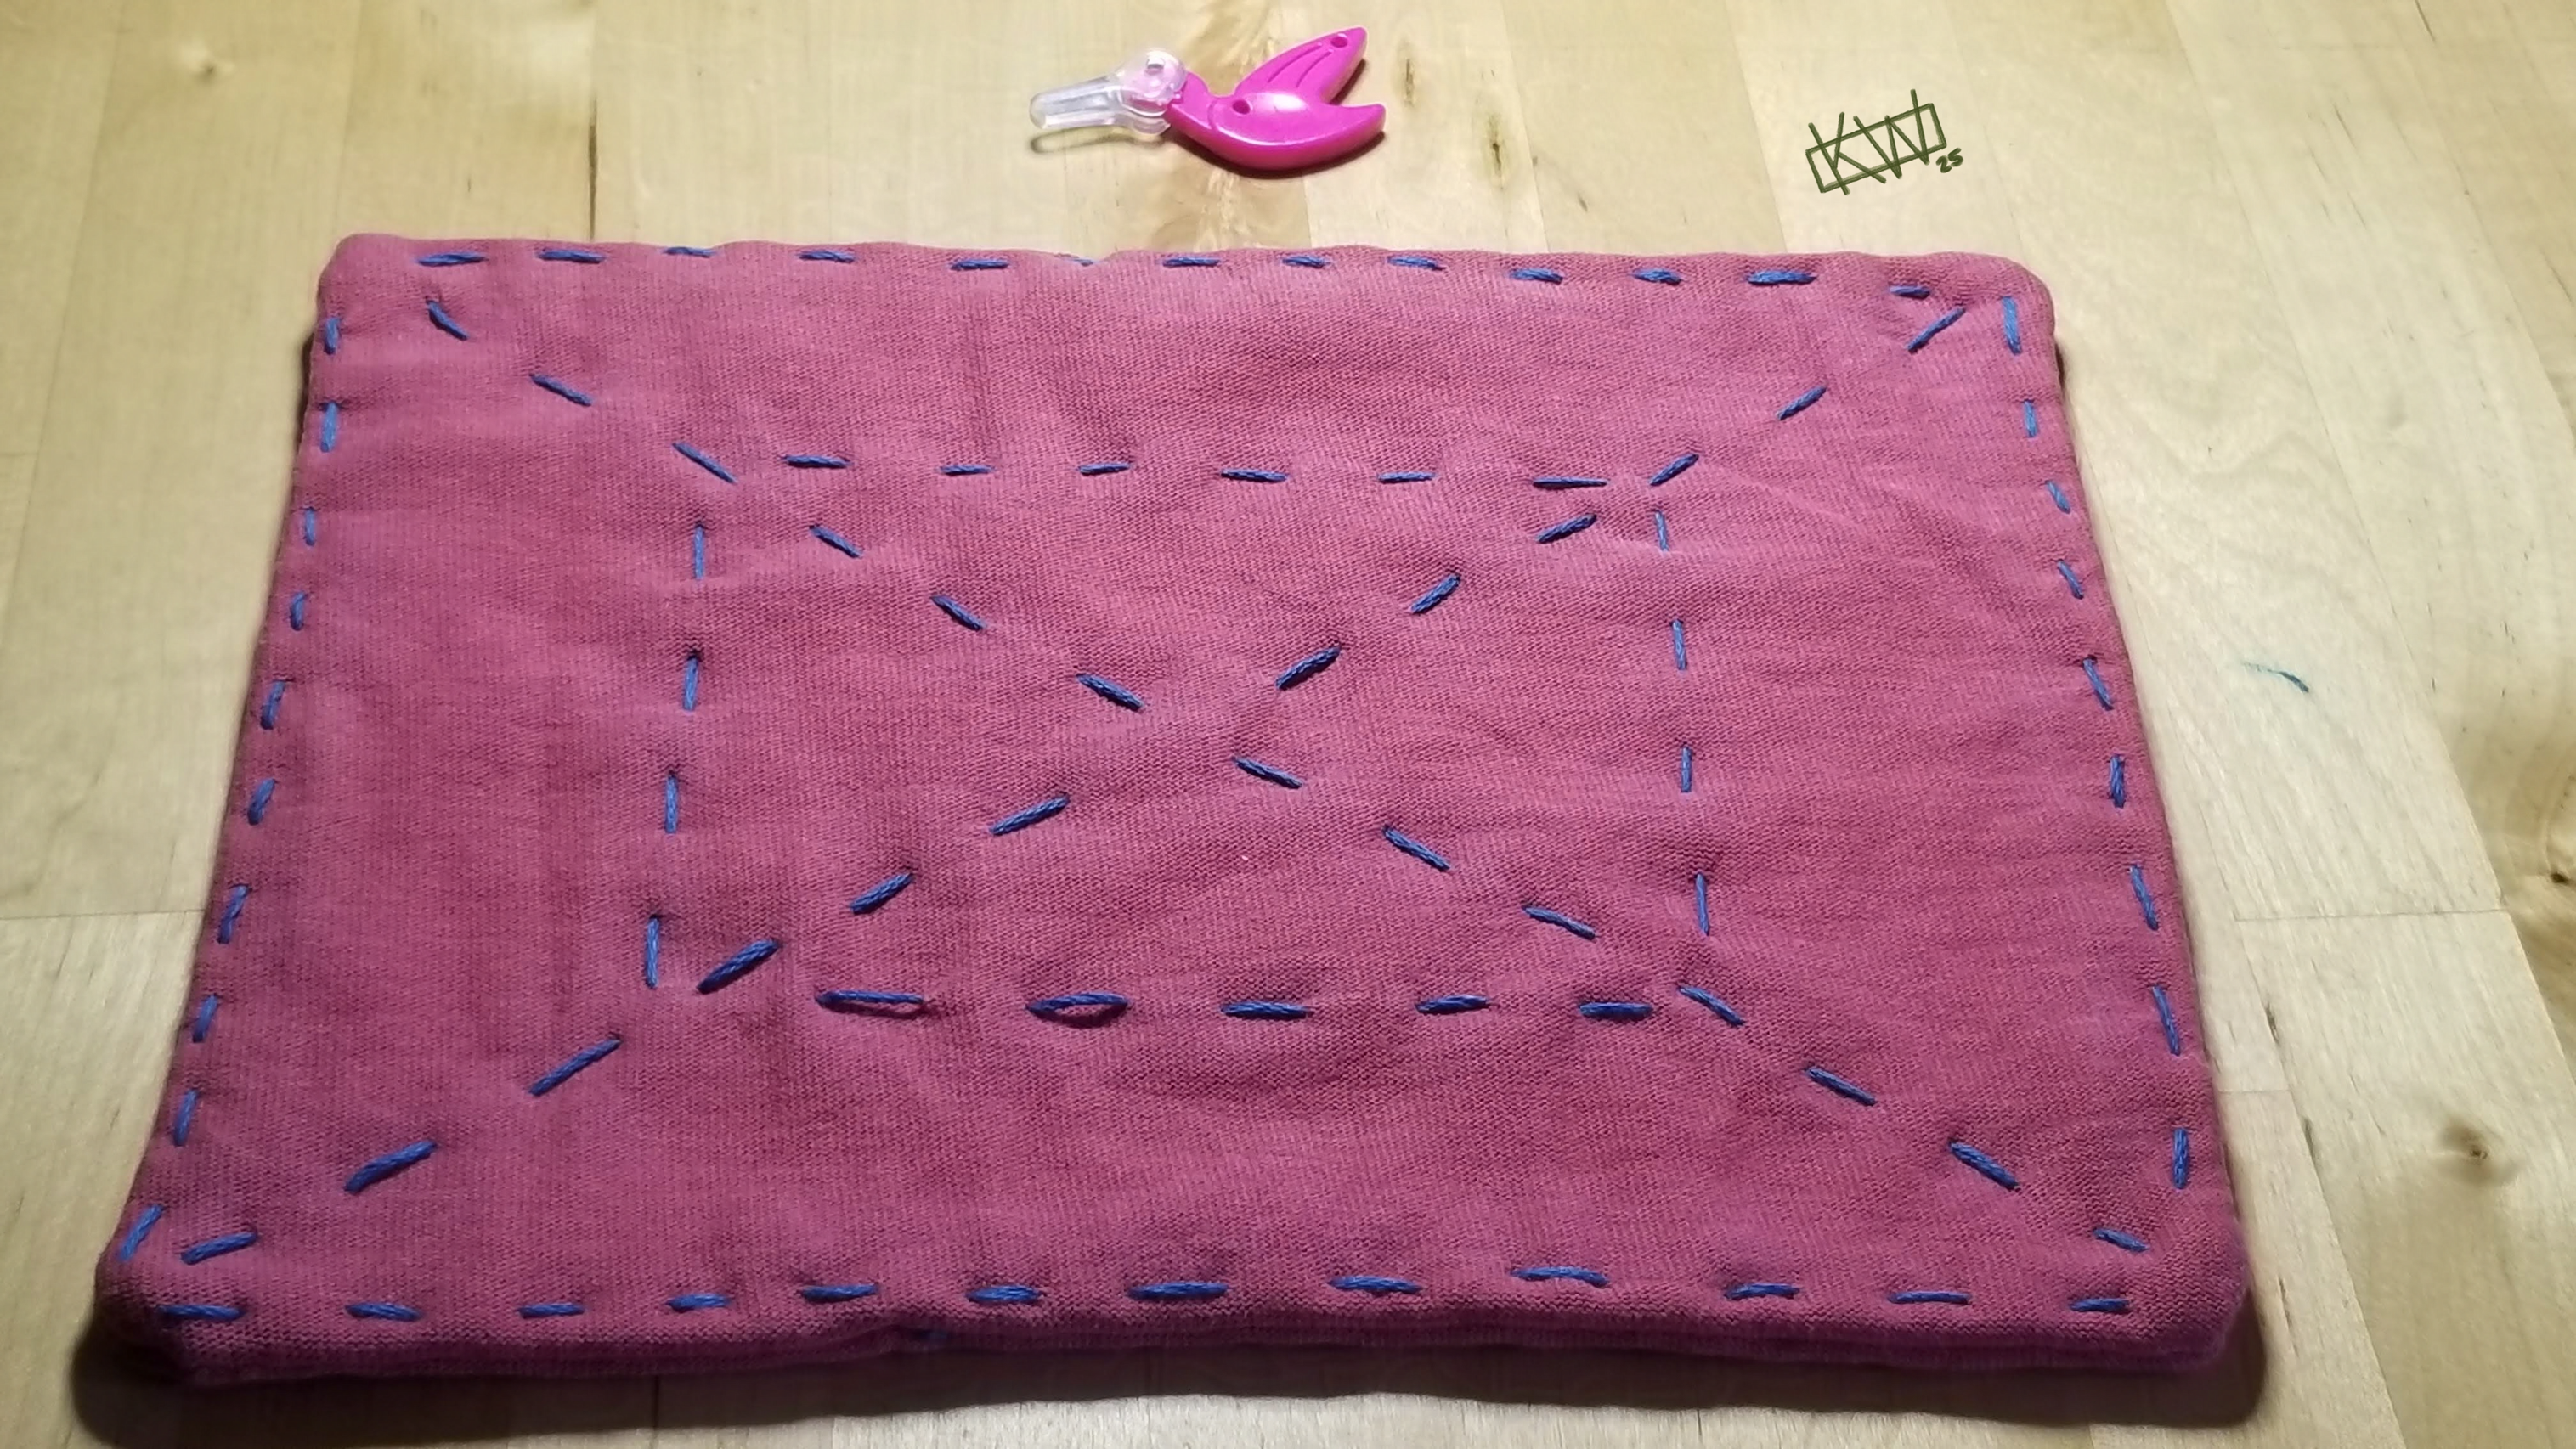
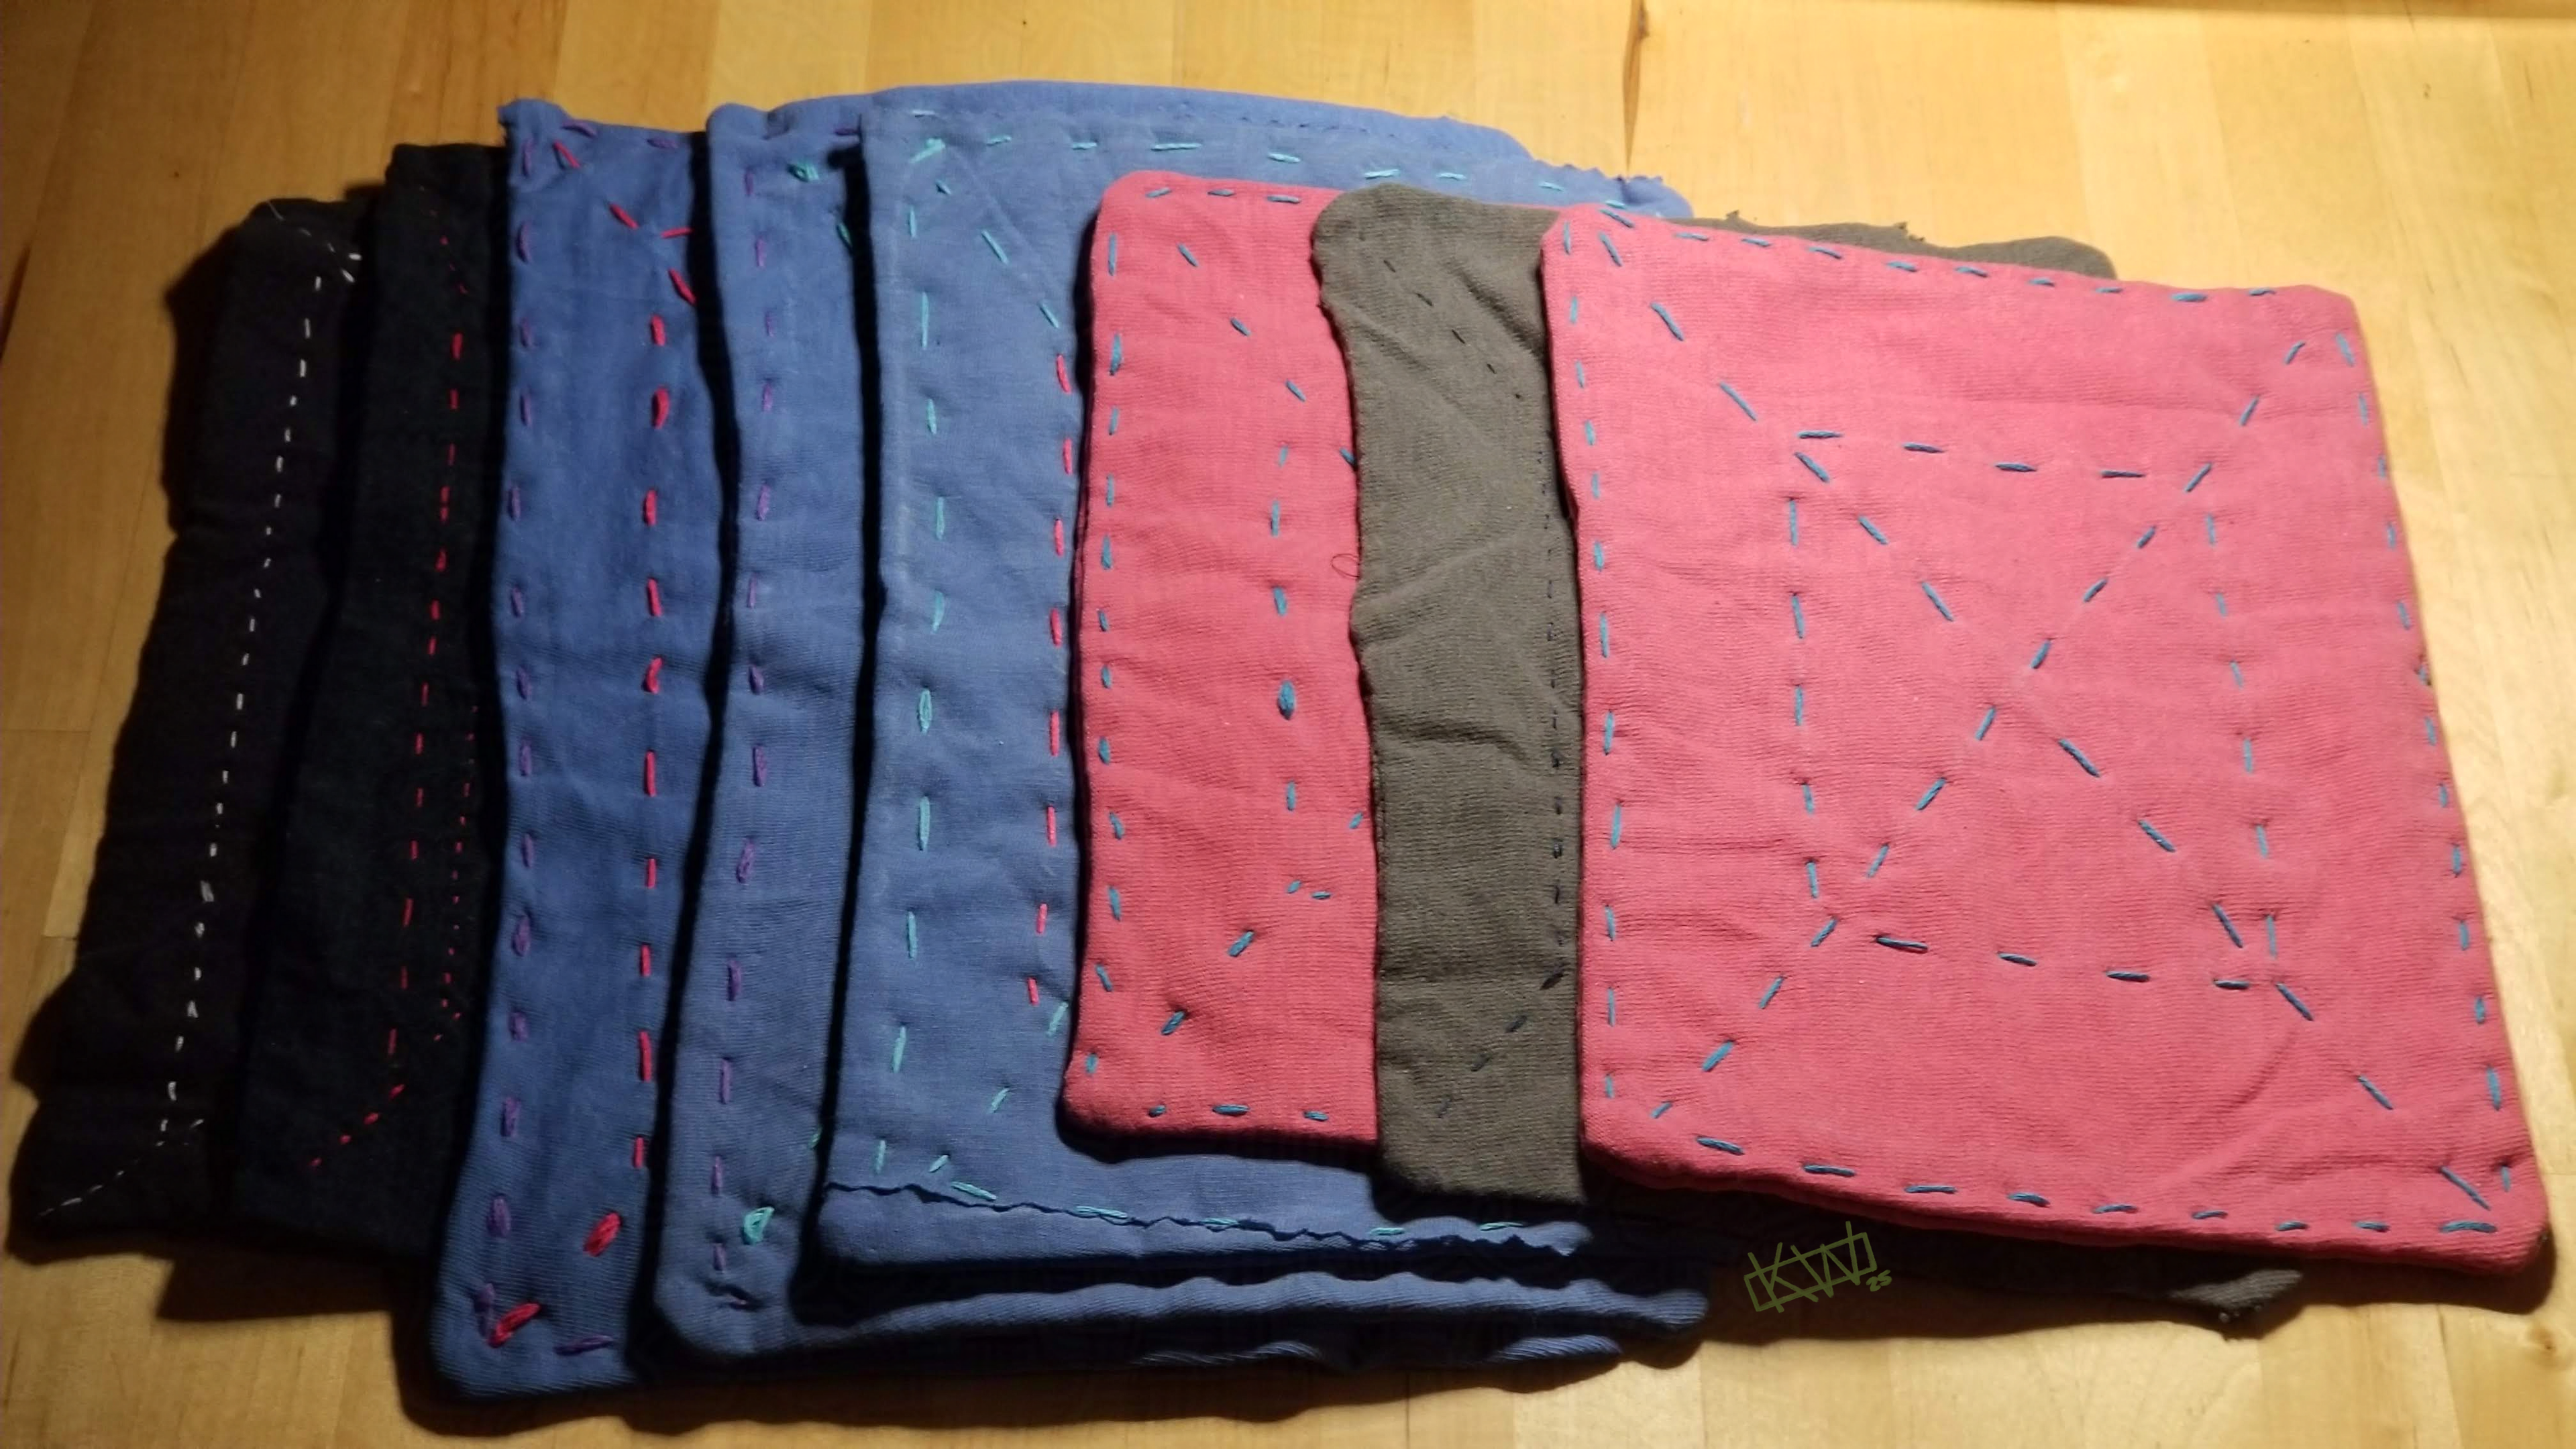 Don't make fun of my stitches, I was sick!
Supplies
- Needles & Pins
- Scissors
- Something to mark the fabric, if you want things to be nice & neat.
- Thread:I use both regular thread & embroidery thread in the example pictures, but I have made zokin in the past using entirely one type of thread. This project began as a way to use up my old, cheapest threads & even my oldest zokin hold up well, so use whatever you have.
- Fabric: anything you would make a cleaning cloth out of. I use old t-shirts. Since the fabric will be layered and reinforced, it is OK to use cloth that is worn thin- but avoid cloth with holes in it. Again, these are cleaning cloths. You can get as fancy as you want & make them very pretty, but you certainly don't have to! I tend to keep things basic & utilitarian. This project can be whatever you want! You can even make zokin by hand or using a sewing machine. If you use a machine or know how to hand sew, you can skip the next sections & go right to 'Instructions'.
If You Have Never Sewn Before, Read This Section!
To Knot Or Not To Knot
How do you start & end each thread? You can't just leave the ends free & hope for the best. Sometimes you can just anchor the ends with knots, for that it is fastest to tie a quilting knot at the beginning & a finishing knot at the end. Sometimes you don't want a big ugly knot stuck in the middle of your sewing & that is when you use a backstitch.
Running With Stitches
The Running Stitich is the only one you need to know for this project. I use a very simple stitch pattern for my zokin. In my experiments I have found that a more complicated pattern does not make zokin work better or more efficiently, but it does make them look much nicer. If you want to make yours prettier, find a sashiko pattern you like! There are tons of them for free all over the internet & they are all made with a simple running stitch!
Whether Or Not You Have Sewn Before, Read This Section!
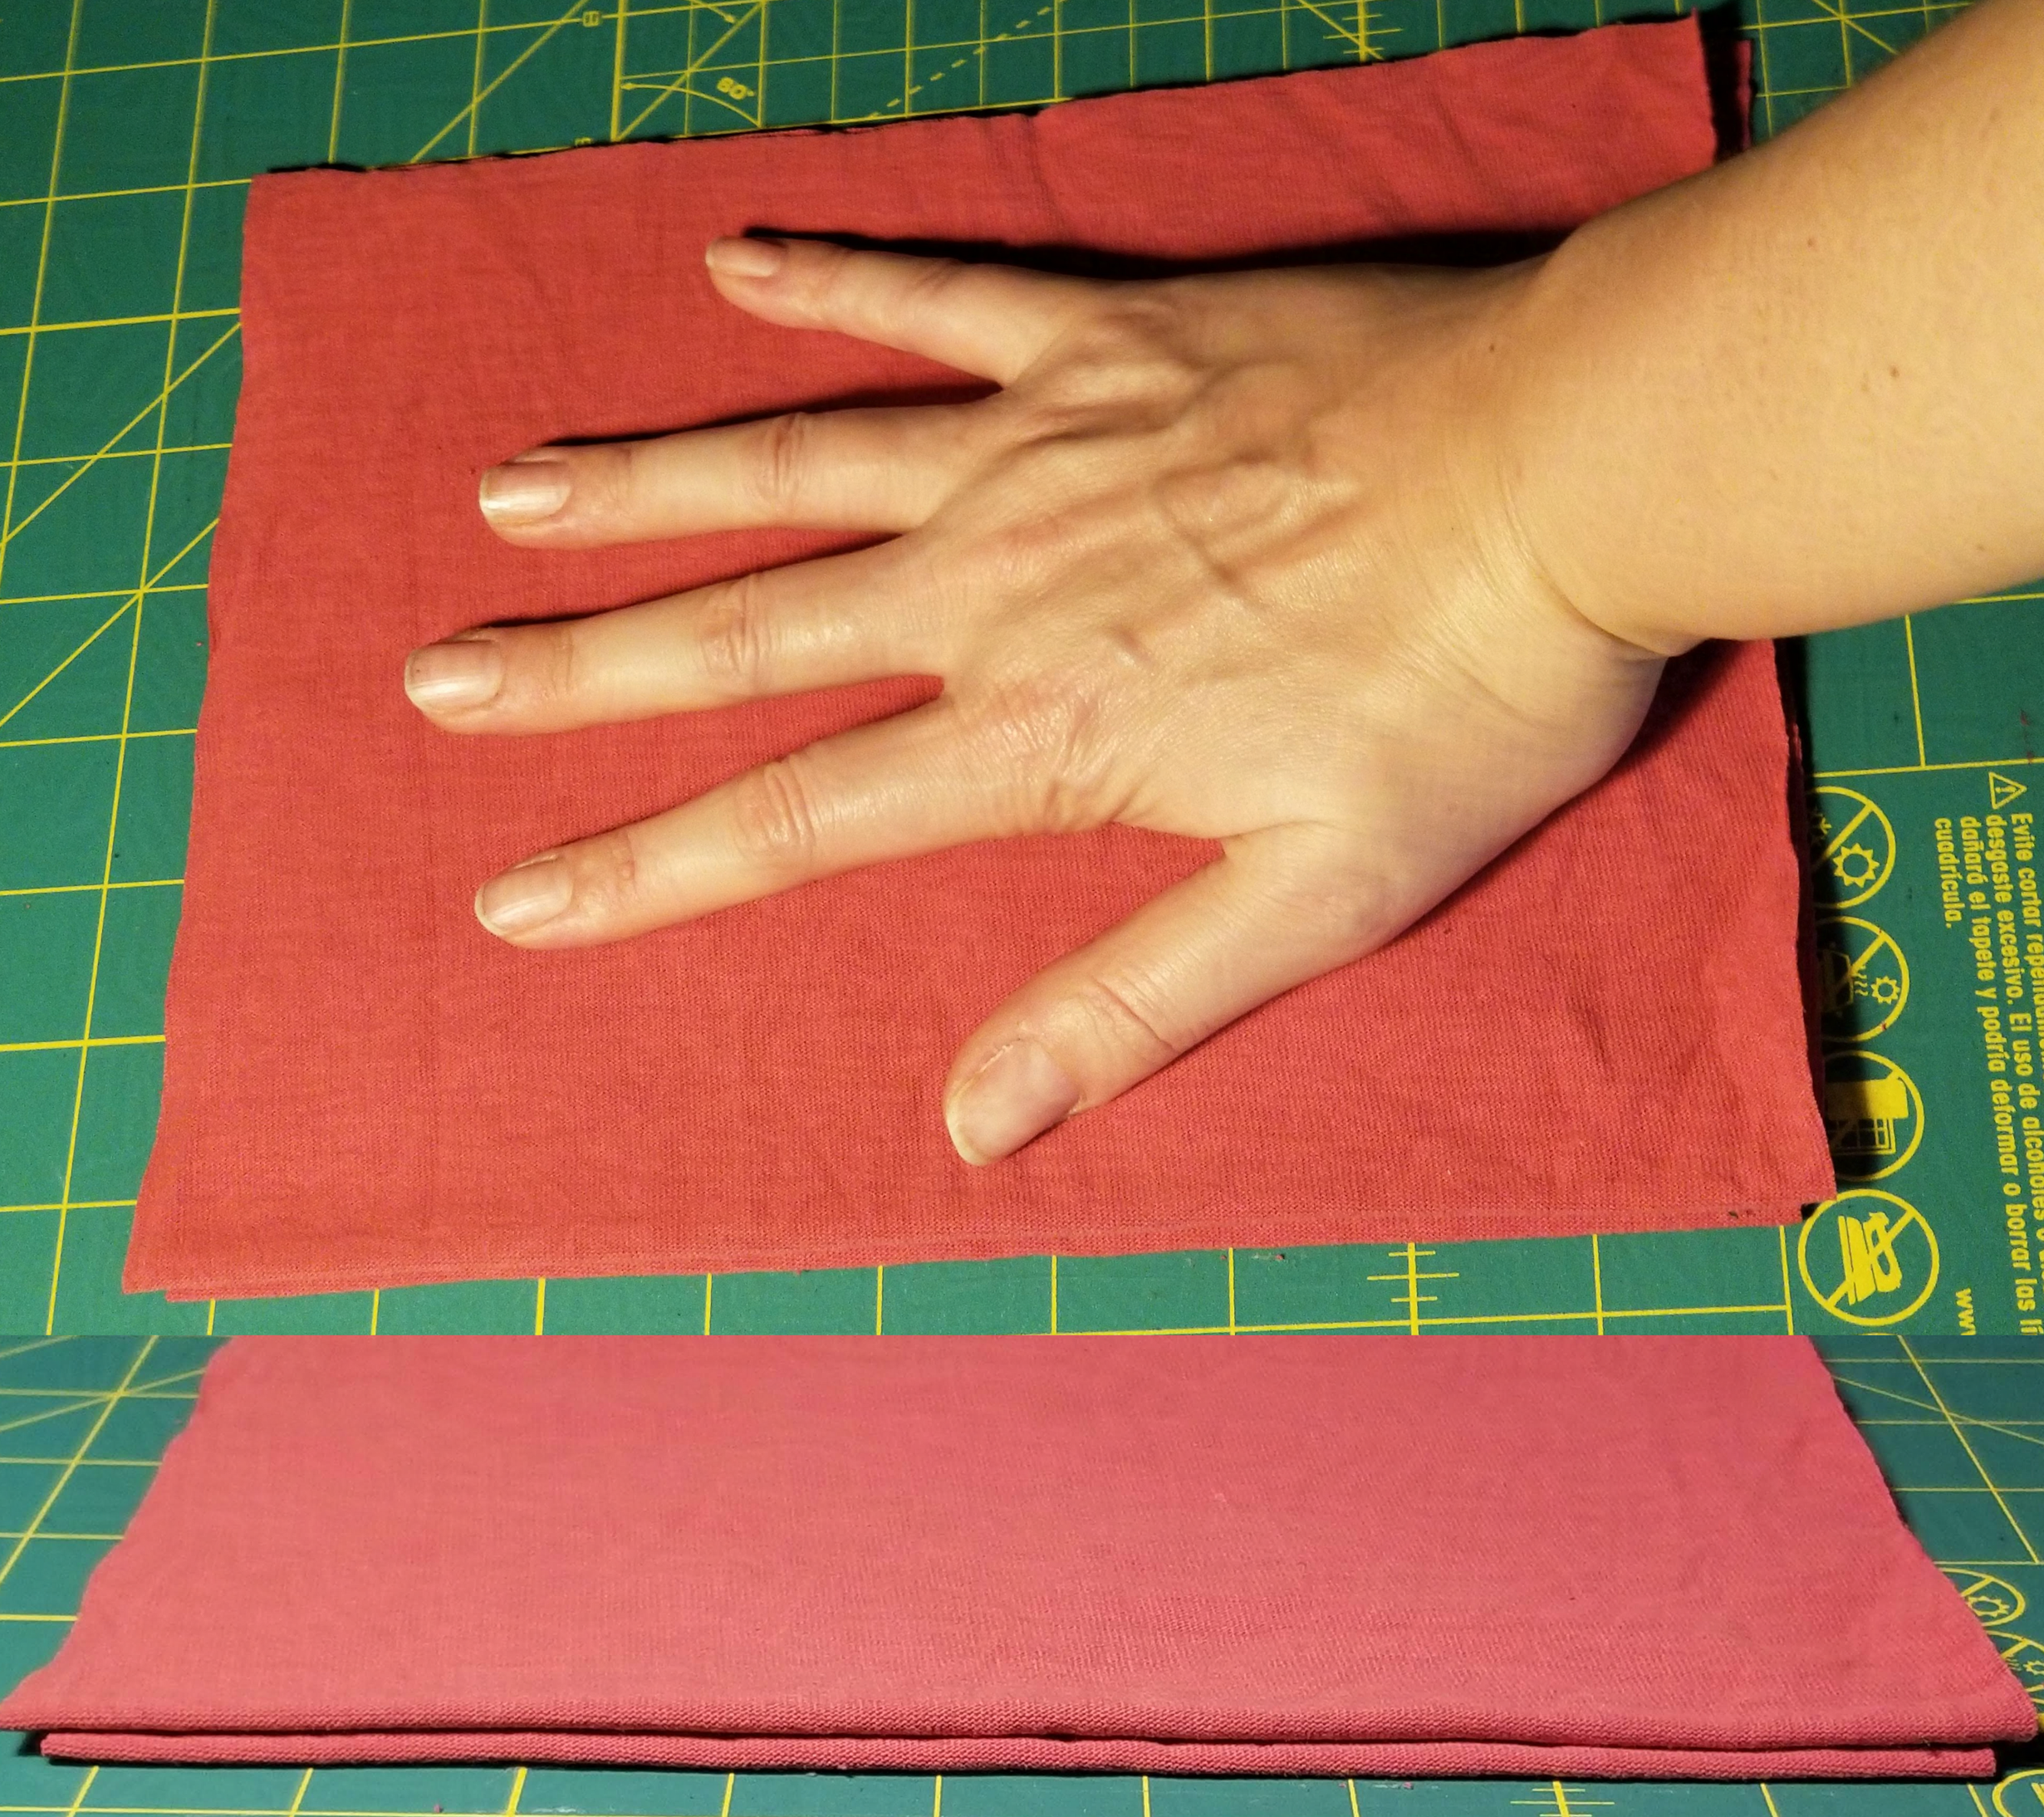
Cut Your Fabric Cut rectangles out of 2 layers of thick fabric, or 4 layers of thin fabric. Since I make these out of old shirts I usually use 4 layers, and sometimes as I cut I have to swerve my scissors around holes. Some of my zokin are more blobby than rectangular! Just make sure they are larger than your hand is with your fingers splayed out, as shown here.
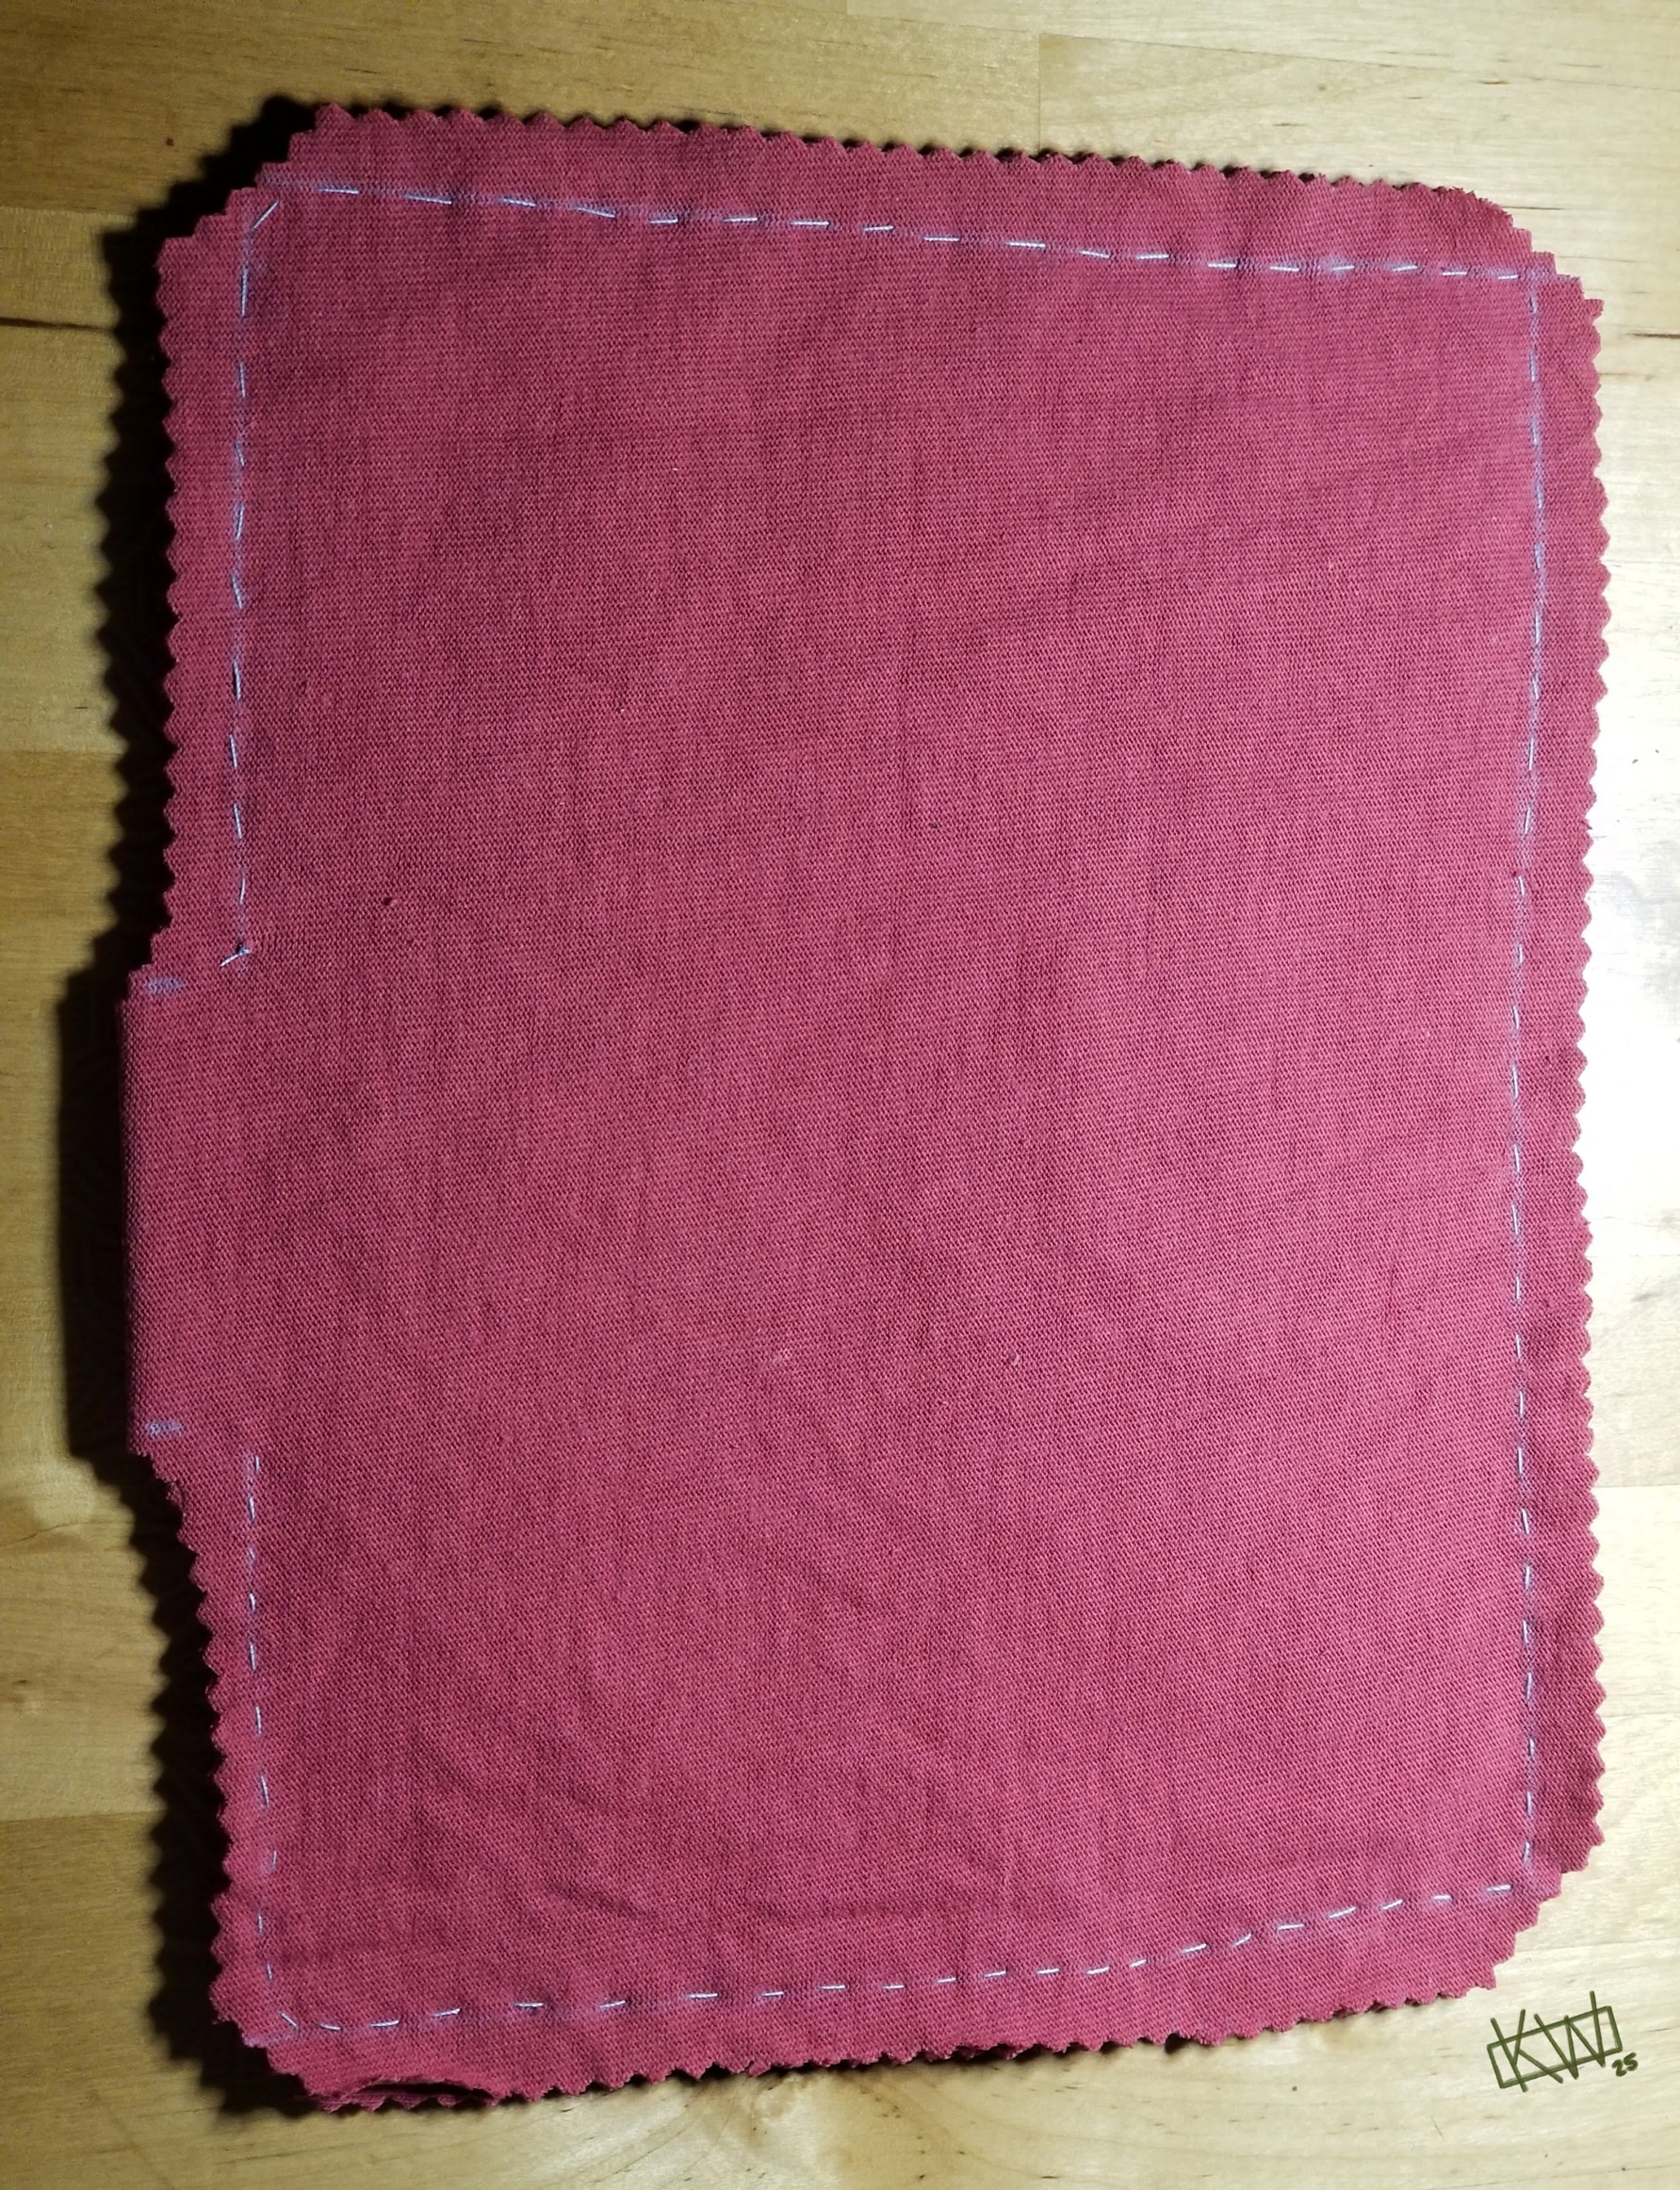
Sew You Layers Together, Flip Right Side Out This is where you start with a quilting knot, sew almost all the way around, and end with a finishing knot. Leave a 2 inch gap in your sewing. Trim the edges & corners of your zokin, but do not cut into your stitches . Use the gap you left in your sewing to turn the zokin inside out, hiding the seam you just sewed inside.
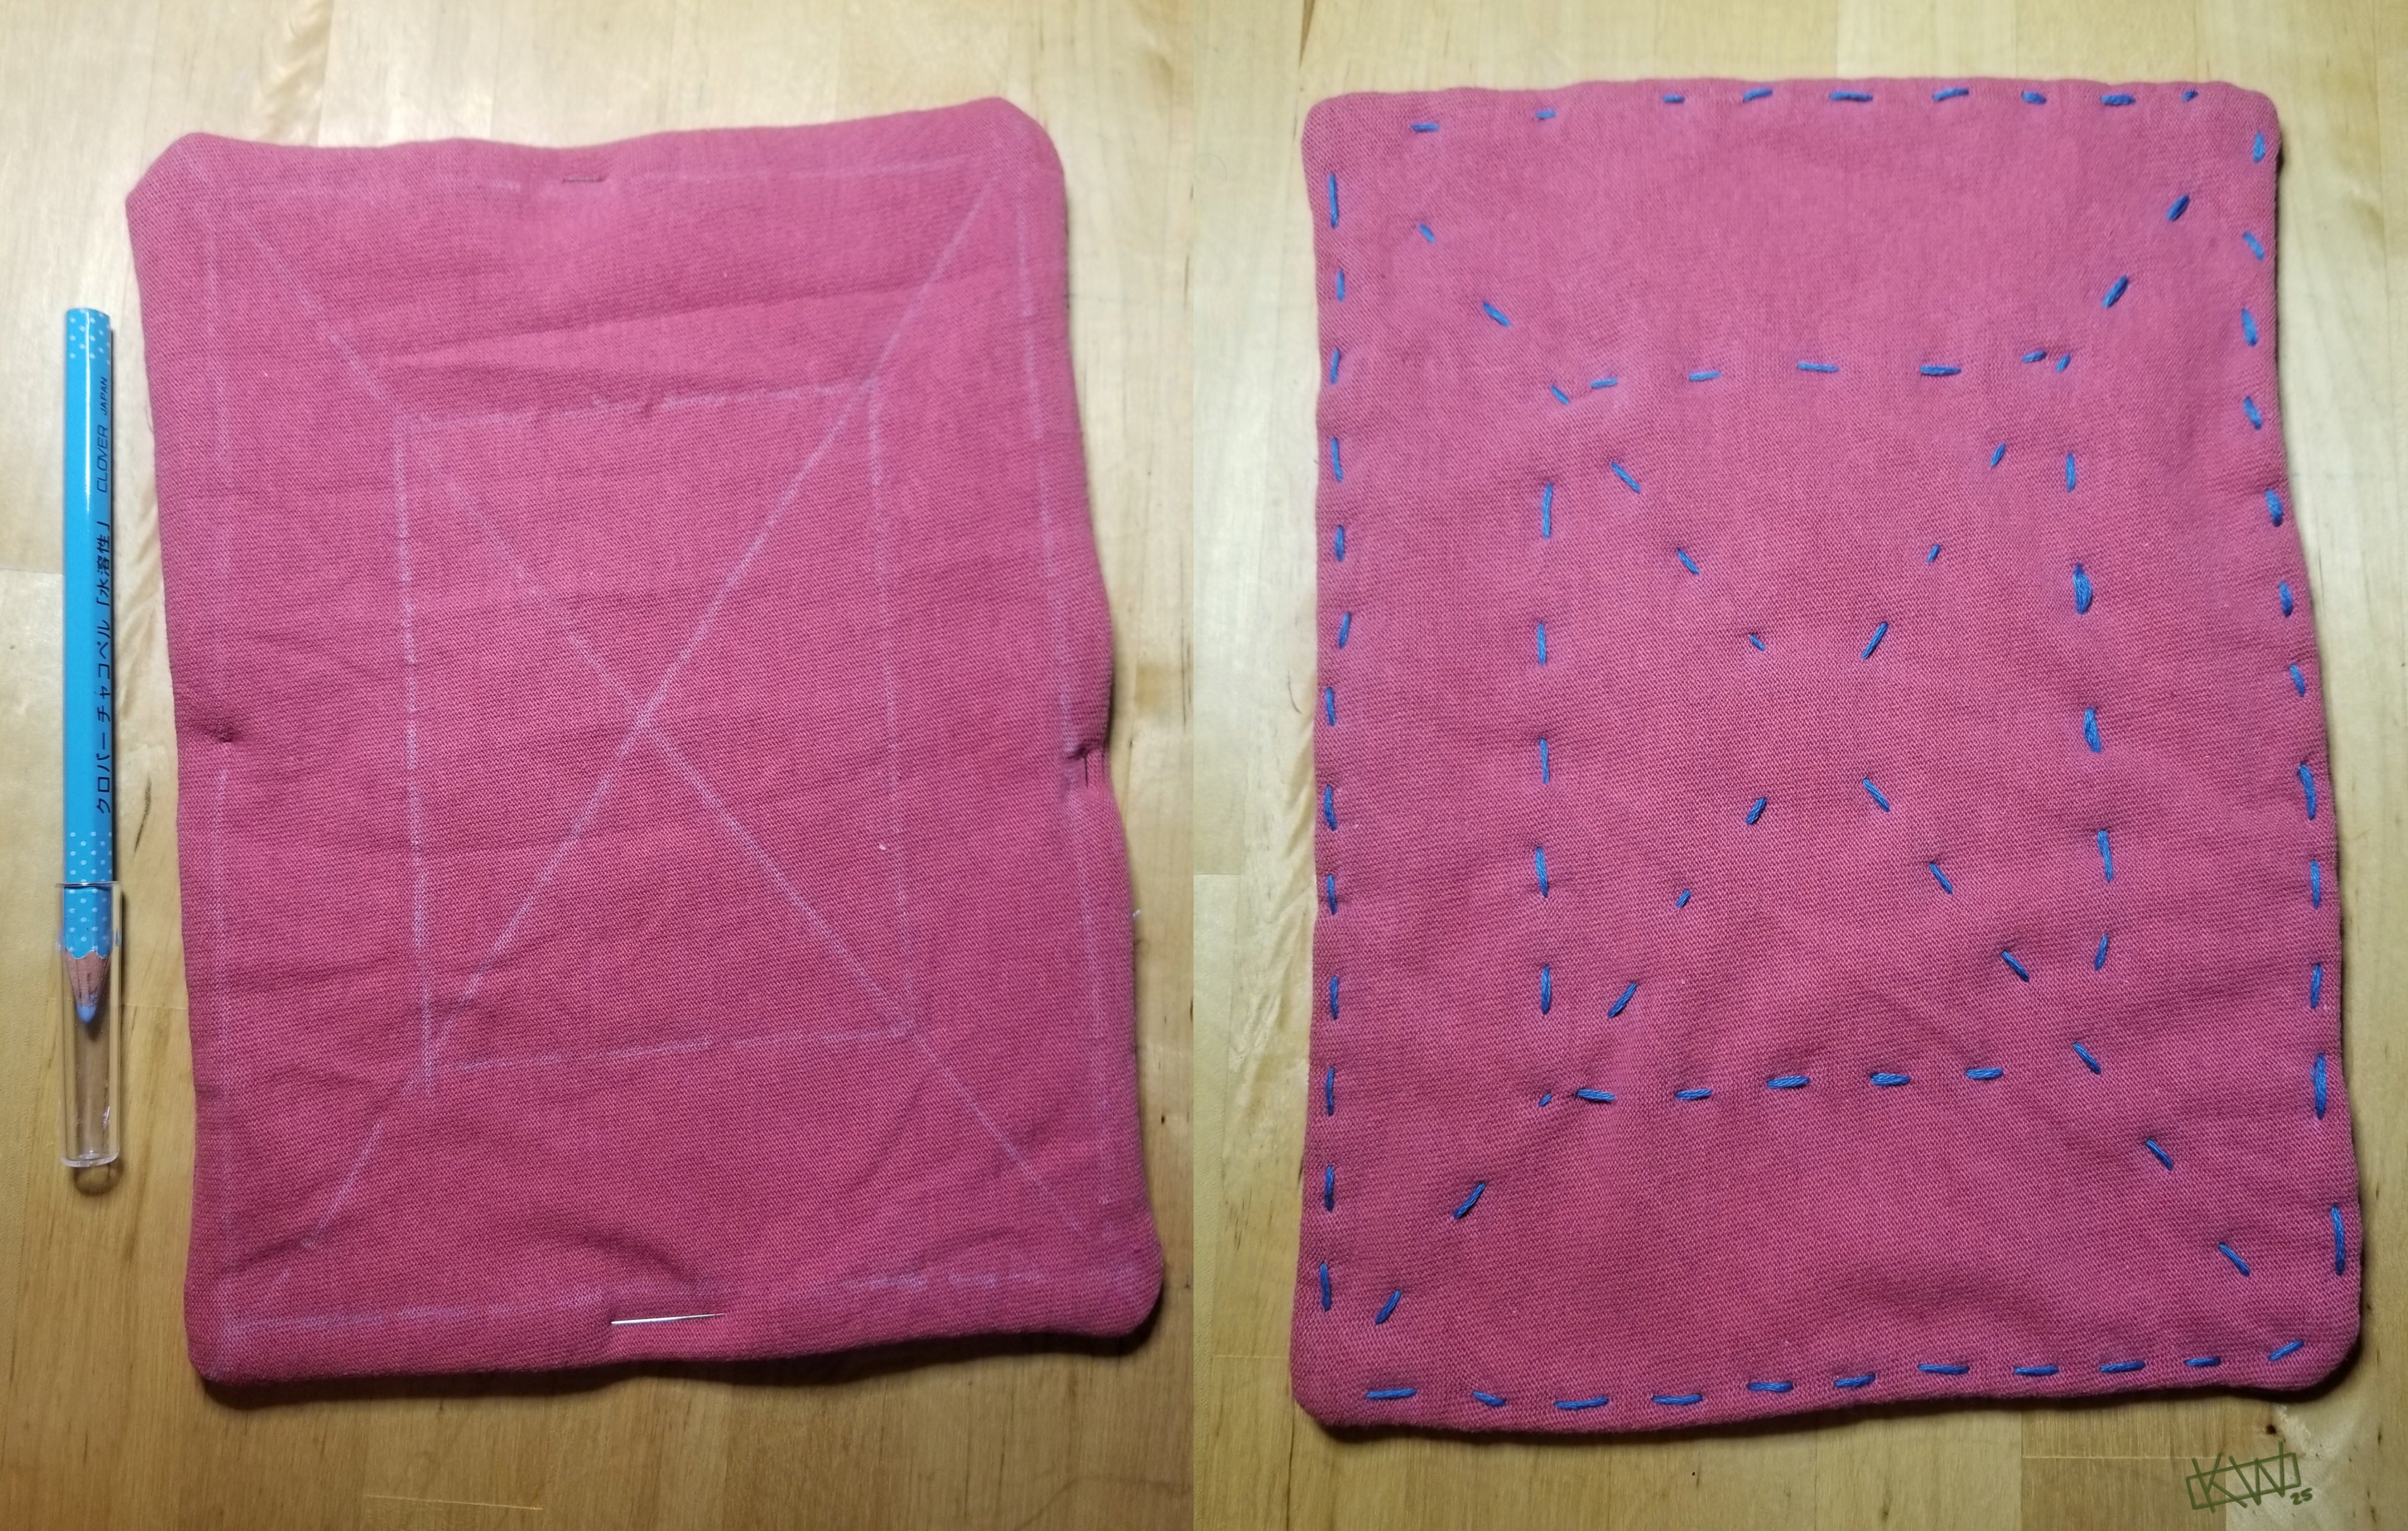
Draw/Stitch Your Embroidery Pattern As you can see, I drew a line from each corner to form an X, then a series of concentric rectangles. Sewing this part gives the zokin a little more body & texture so it cleans better. Make sure you sew along the outer edge to close the gap you used to turn the fabric right sides out. Since you will be able to see both sides of your stitching for this part, use a backstitch to anchor your thread. Then get stitching!
Revel In The Joy of Creating Something New
Put on your favorite music & get to cleaning!
Are you gearing up for spring/autumn cleaning? How do you get ready? Let me know on Mastodon or Ko-Fi! Have a fantastic day, draw something for my art challenge, see you next week!
Get my art on mugs & vinyl stickers in my Shop!
Donate to support my works & get cool perks on Ko-Fi
Join us for #ArtABCs, the best art challenge on the internet!
- All pictures posted are my own work.
- All reviews are my own unpaid & unsolicited opinions.